Windows Installation &
Activation Guide
A clean, comprehensive, step-by-step walkthrough to safely download official Microsoft Windows, create bootable flash media, install the OS, and activate Microsoft products.
1. Windows ISO
Obtain untouched, official Windows 10 & 11 ISO files directly from Microsoft.
View Guide2. Bootable USB
Configure Rufus correctly with Partition Schemes and bypass security checks.
View Guide4. MAS Activation
Activate Windows & Microsoft Office permanently using standard MAS scripts.
View GuideOfficial Windows ISO
Download Guide
A step-by-step walkthrough to safely obtain untouched Windows 10 and Windows 11 ISO files directly from Microsoft's servers.
Select Windows Version
Toggle to see download instructions for Windows 10 or Windows 11.
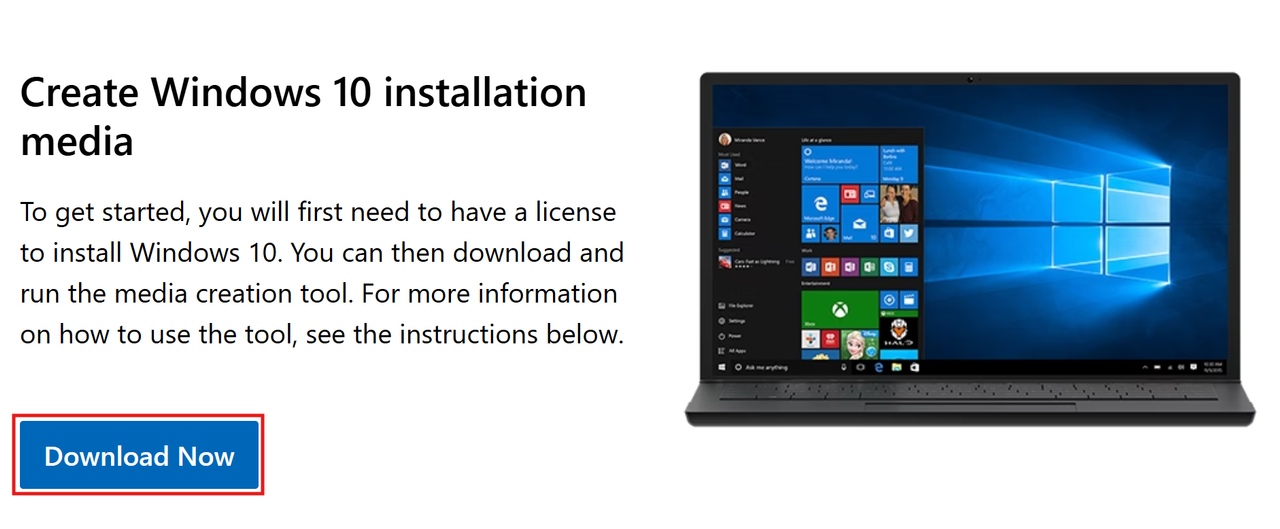
Create Windows 10 Installation Media Download
To get started, you will first need to have a license to install Windows 10. You can then download and run the media creation tool. For more information on how to use the tool, see the instructions below.
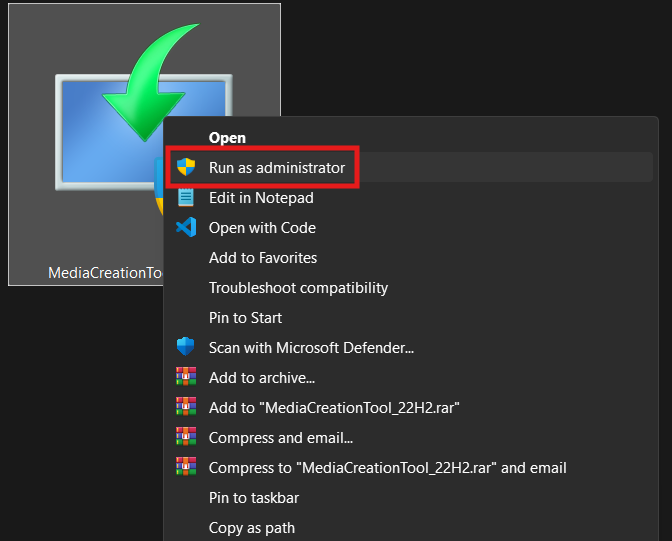
Run MediaCreationTool as Administrator
Go to the folder where your downloaded file is located, right-click, and run the MediaCreationTool executable. If the User Account Control (UAC) window appears, click "Yes" to allow the tool to start.
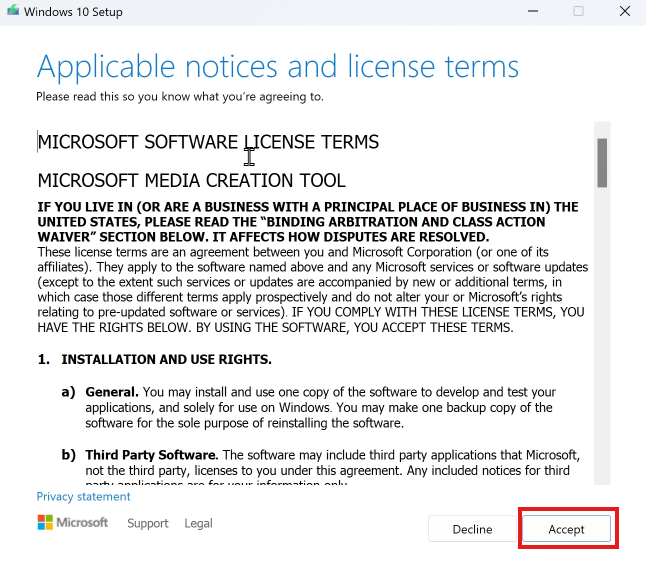
Accept License Terms
The wizard will load the setup configurations. Carefully read the applicable notices and license terms, then click "Accept" to proceed.
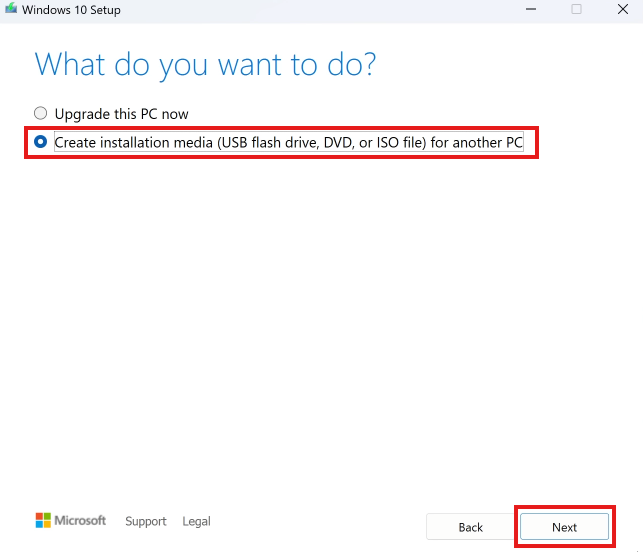
Choose What You Want to Do
Select the option "Create installation media (USB flash drive, DVD, or ISO file) for another PC". Do NOT choose "Upgrade this PC now" if you want a clean ISO file for bootable media. Click "Next".
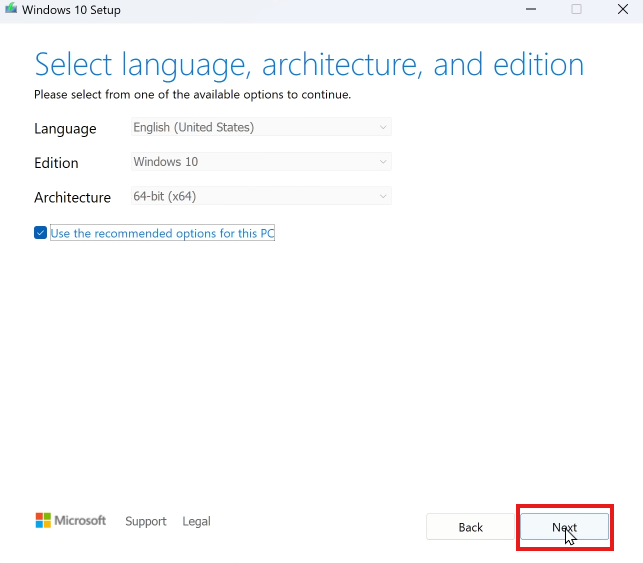
Select Language, Architecture & Edition
Choose your preferred Language, Windows Edition, and Architecture (usually 64-bit (x64) is highly recommended for modern computers). After confirming, click "Next".
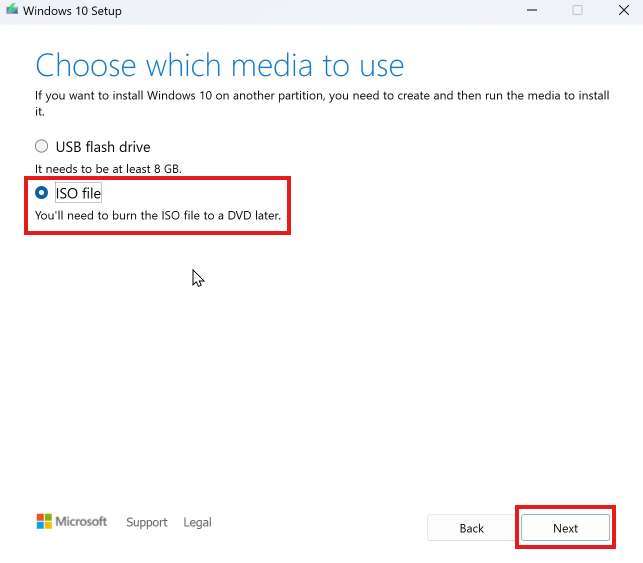
Choose Which Media to Use
Choose "ISO file" as your media option and click "Next". This downloads the official file containing the operating system, which you can burn to a USB later using Rufus or Ventoy.
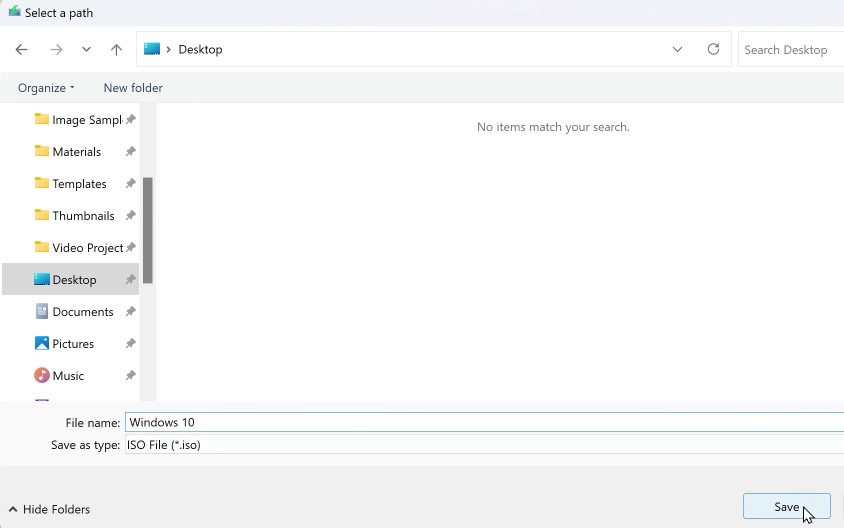
Choose Download Folder
A file explorer window will open. Select the folder (e.g. Downloads or Desktop) where you wish to save the Windows 10 ISO image, name the file, and click "Save".
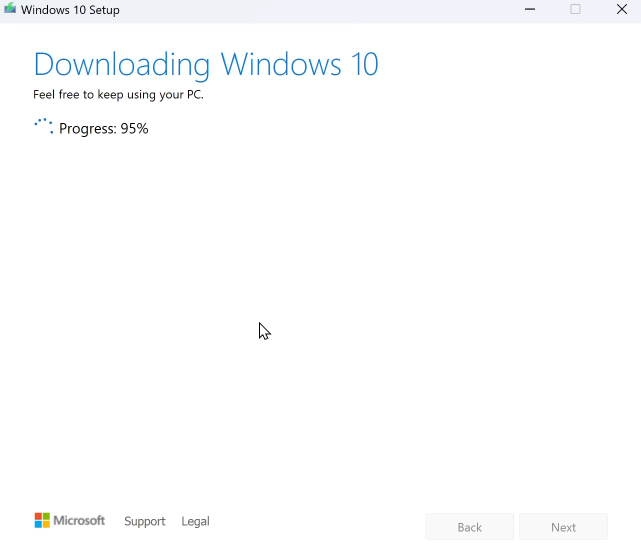
Downloading Windows ISO File
The tool will begin downloading the Windows 10 ISO file. This process may take some time depending on your internet connection speed. You can continue using your PC while the download runs in the background.
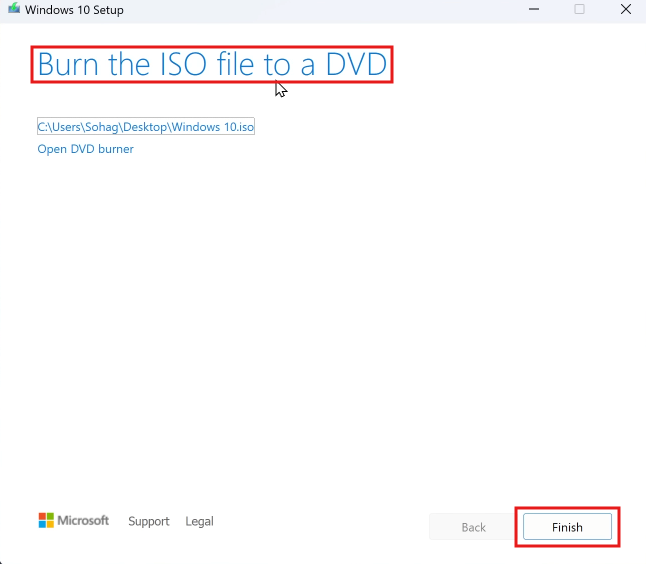
Finish the Process
Once the download is finished and the tool verifies the files, click "Finish" to close the Media Creation Tool safely.
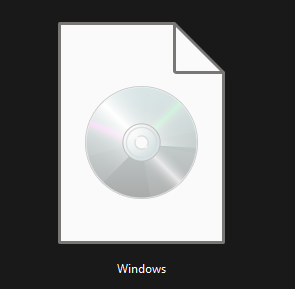
Verify ISO File Download
Open the target directory to verify that the Windows.iso file has been created successfully. Verify the size of the file (typically between 4GB and 6GB).
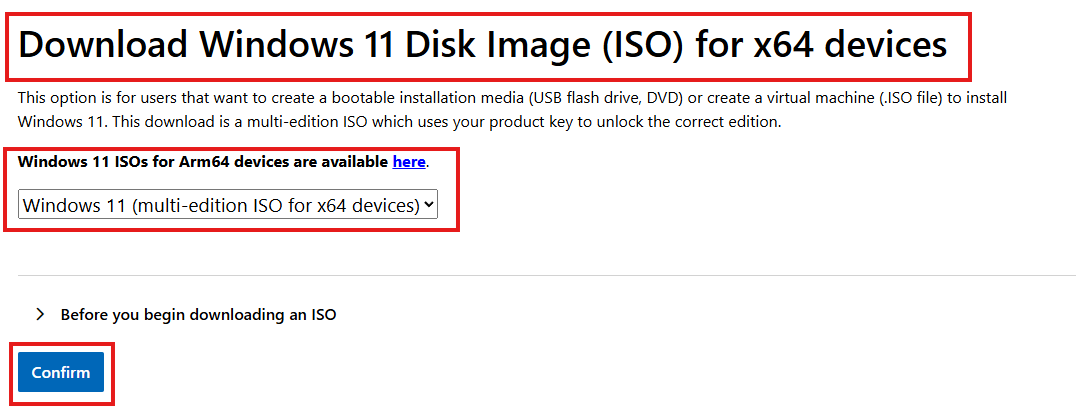
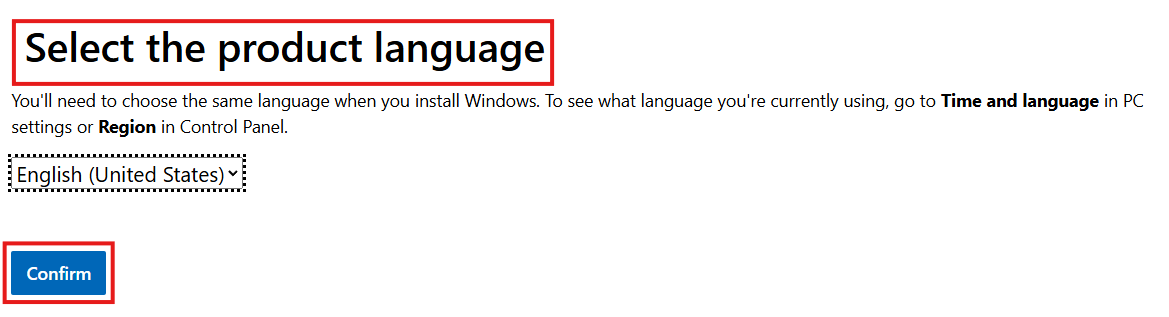
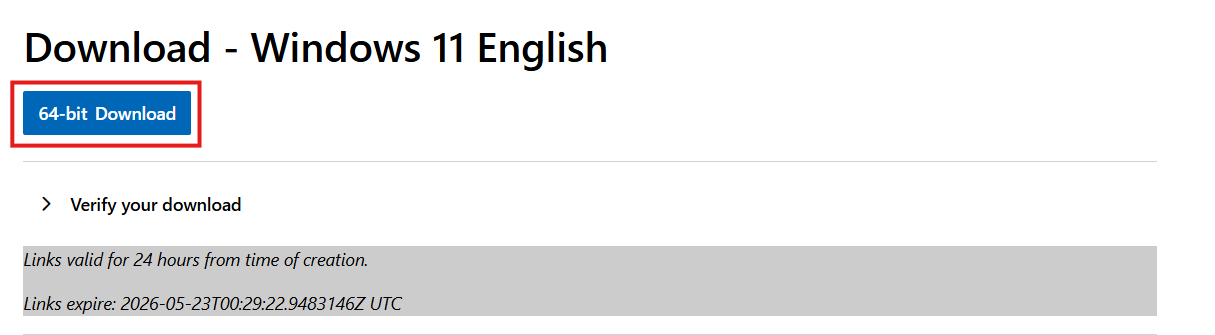
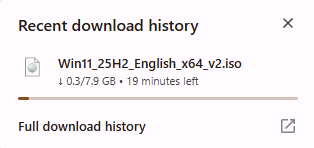
Bootable USB Setup
(Rufus Guide)
A step-by-step walkthrough to flash your Windows ISO onto a USB drive and bypass installation hardware checks.
Select Target Windows OS
Configure settings for Windows 10 or Windows 11.
Open Rufus Application
Go to the directory where your downloaded Rufus utility is located, and double-click to launch it. If the UAC popup appears, click "Yes" to allow it to run.
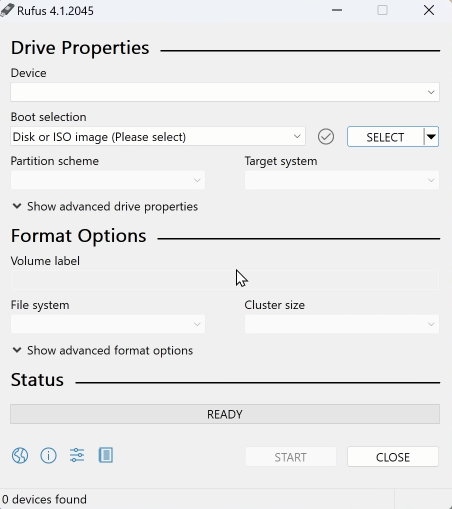
Insert and Detect USB Flash Drive
Insert your USB flash drive (minimum 8 GB capacity) into a USB port on your PC or laptop. Rufus will automatically detect and list the drive under the "Device" field.
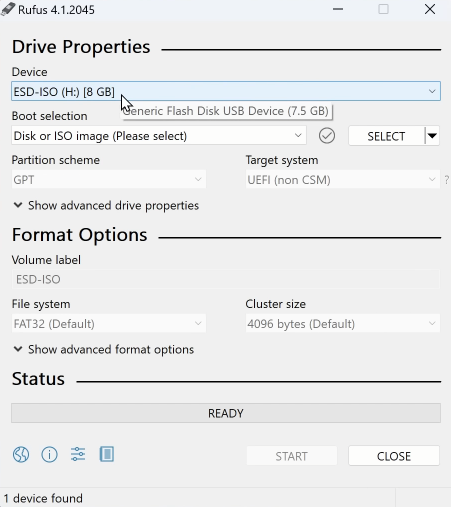
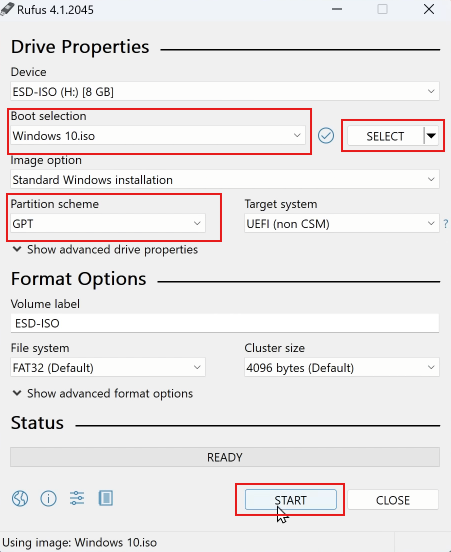
Configure Rufus Settings
Select "Disk or ISO image" under Boot selection, click the "SELECT" button, and choose your downloaded Windows ISO file. Select GPT (UEFI standard) as the Partition scheme. Leave other settings at default and click "START".
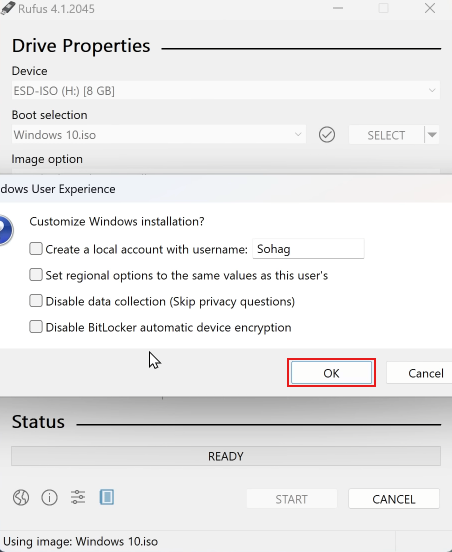
Windows Customization Settings
Windows 10 customization dialog appears. Select "Create a local account with username" and configure it if needed. Then click "OK".
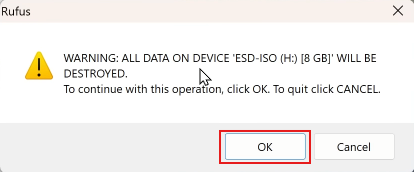
USB Drive Data Erasure Warning
Confirm the format warning by clicking "OK" to begin writing files.
Creating the Bootable USB Drive
Rufus will format the drive and start writing the Windows files to the USB. The green progress bar at the bottom will track the process status. Do not unplug the USB drive.
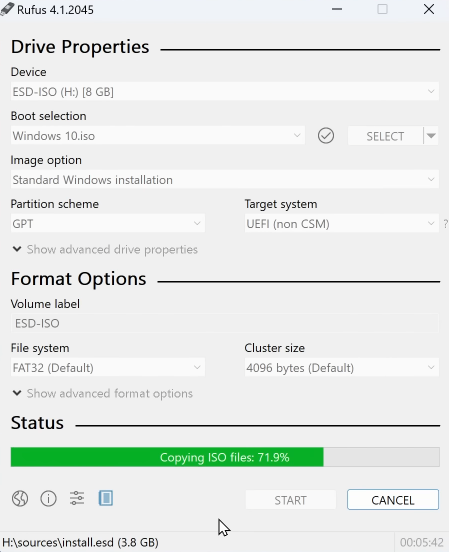
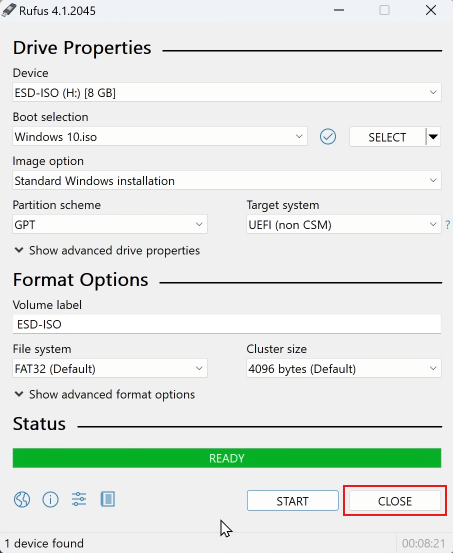
Step 6 — Bootable USB Complete
Wait for the progress bar to reach 100%. Once the state changes to **READY**, your bootable USB is ready. Click **Close**.
Windows 11
Installation Guide
A detailed 24-step walkthrough to boot from your USB media, partition storage disks, and complete Windows 11 setup.
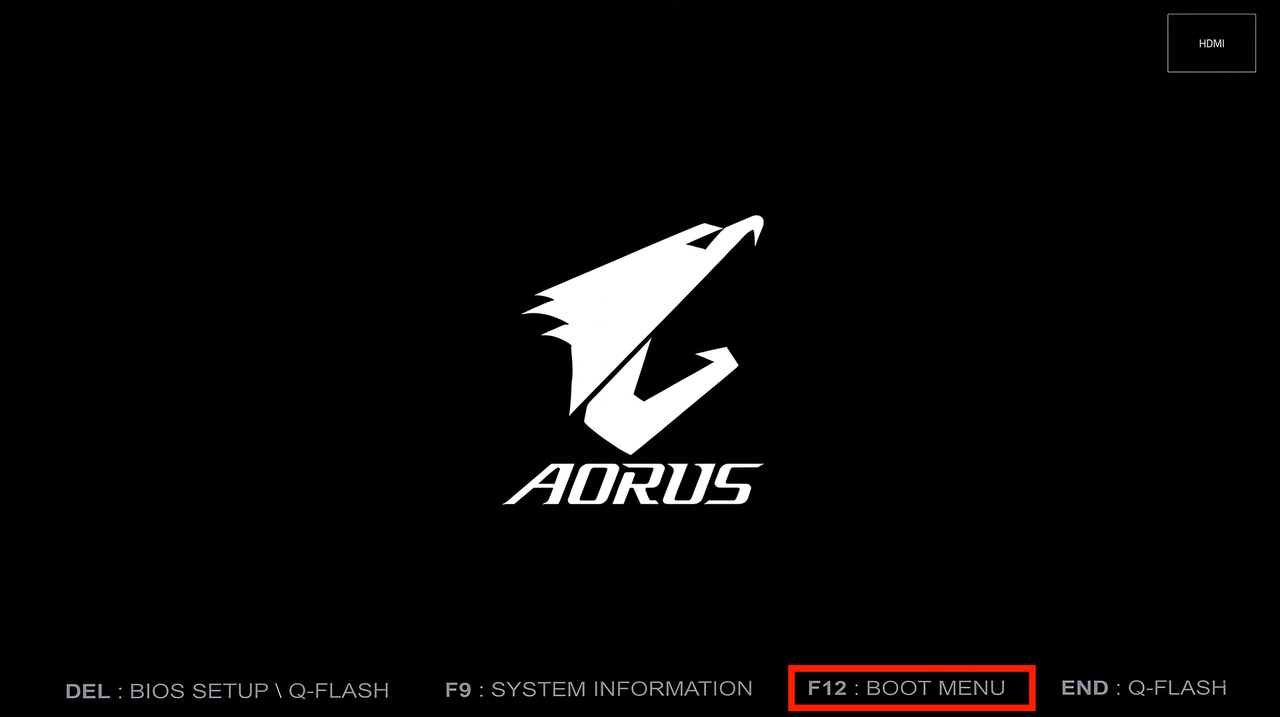
Open Motherboard Boot Menu
Restart your PC and tap your motherboard's boot key continuously (e.g., **F12** on Gigabyte motherboard).
💡 Search Google for your device model if you do not know its boot menu key.
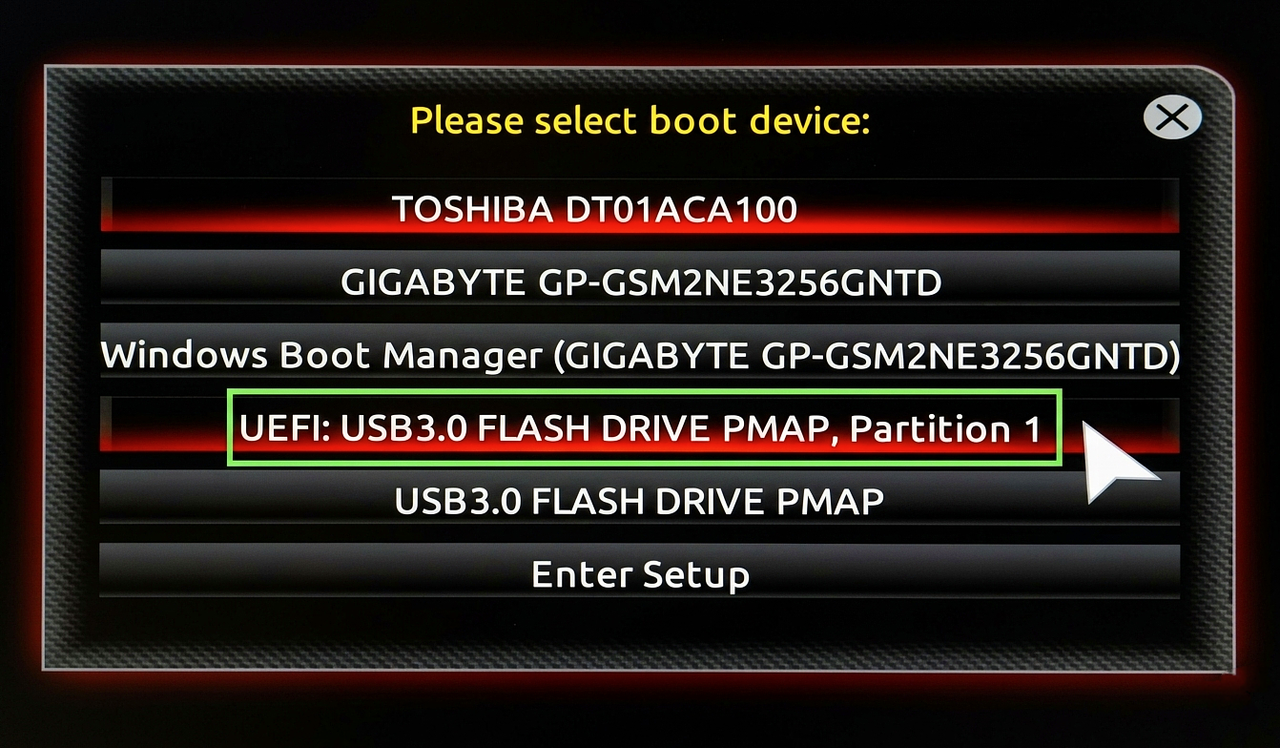
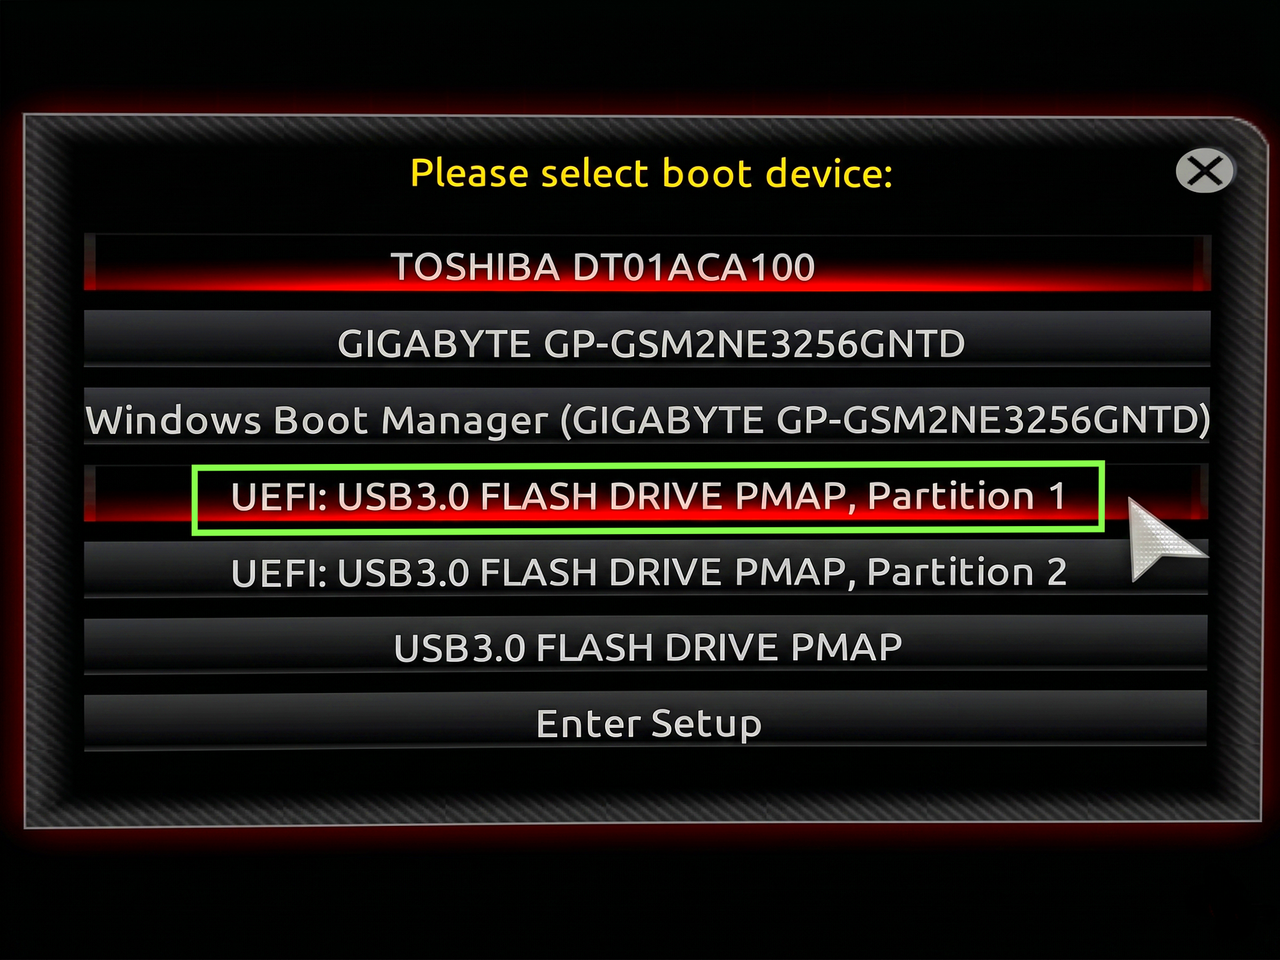
Select Boot Device
Choose your bootable USB flash drive from the list. E.g., **UEFI: USB3.0 FLASH DRIVE PMAP, Partition 1**.
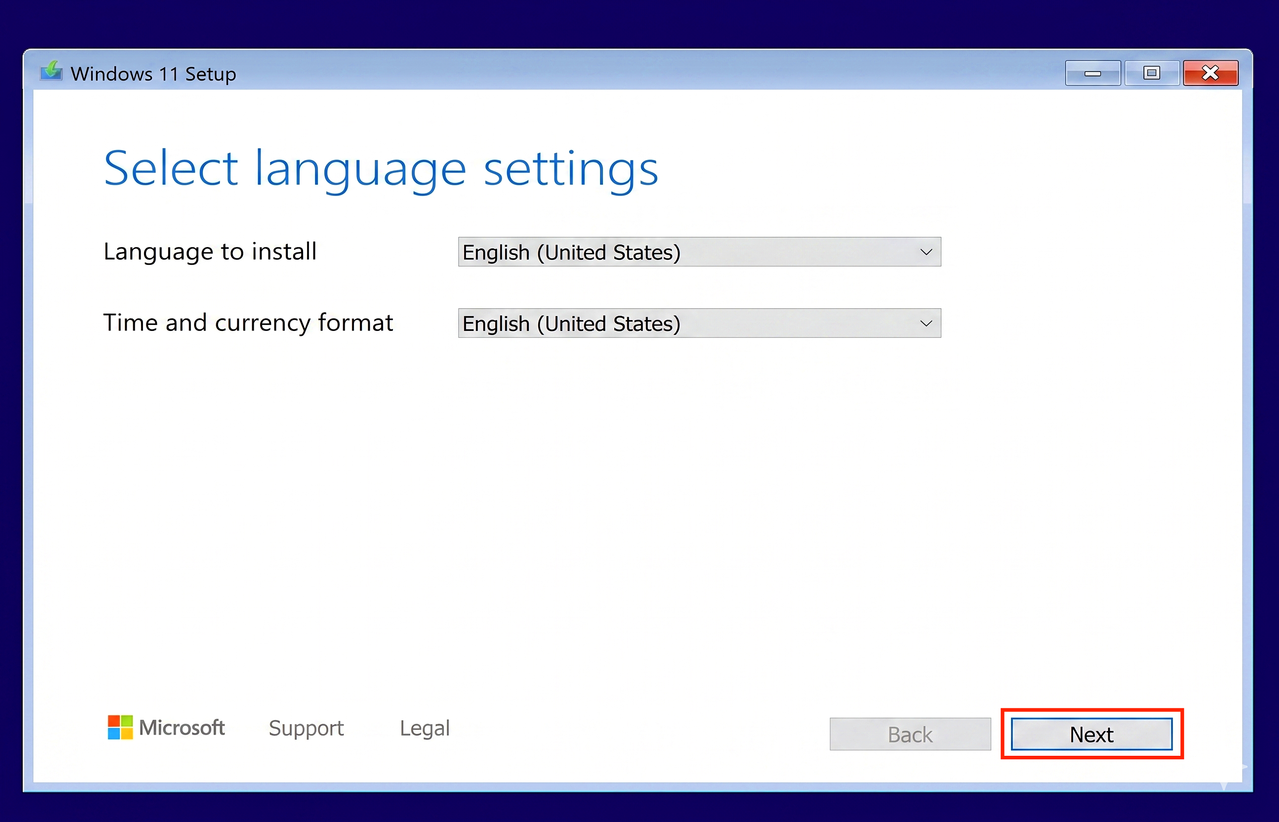
Select Language Settings
Choose your language and regional parameters (English US is recommended). Click "Next".
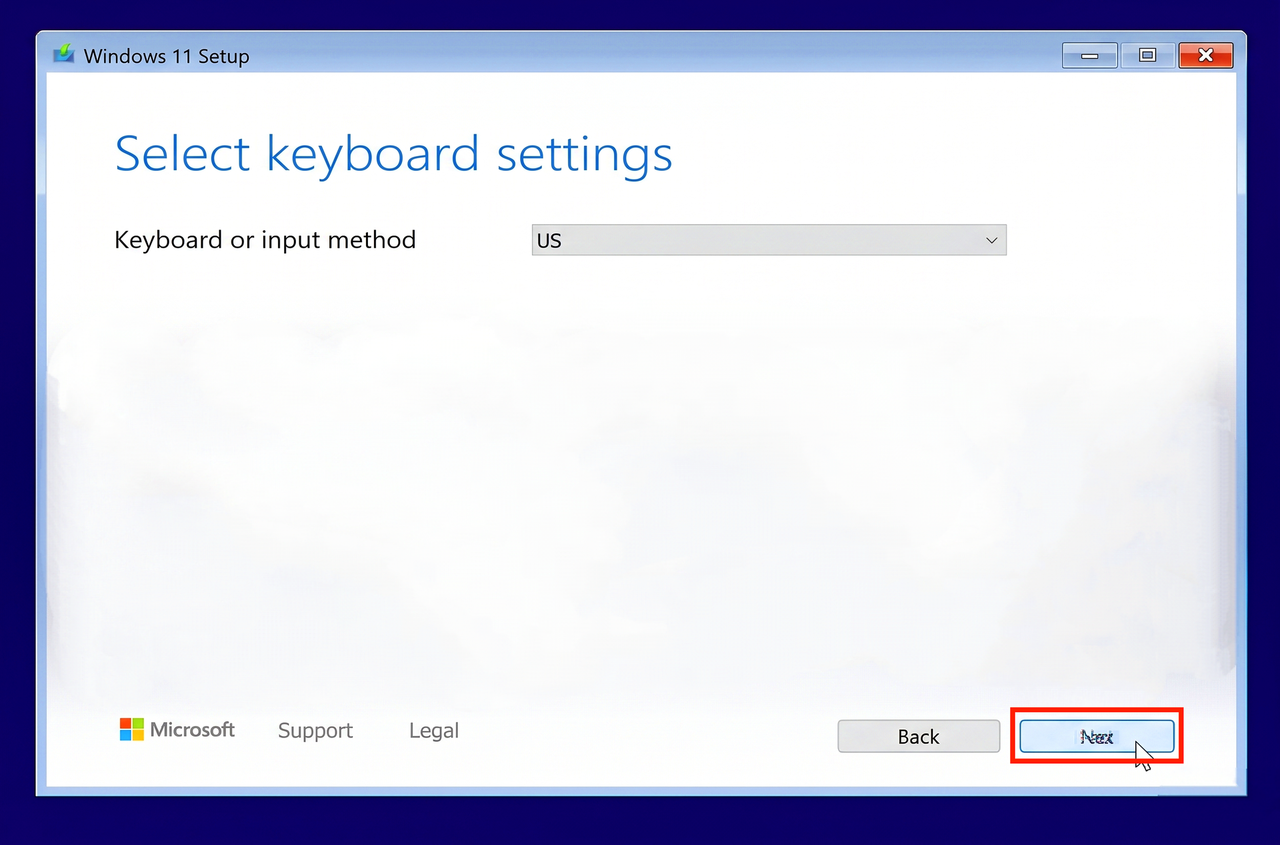
Select Keyboard Settings
Choose your input layout (US layout). Click "Next".
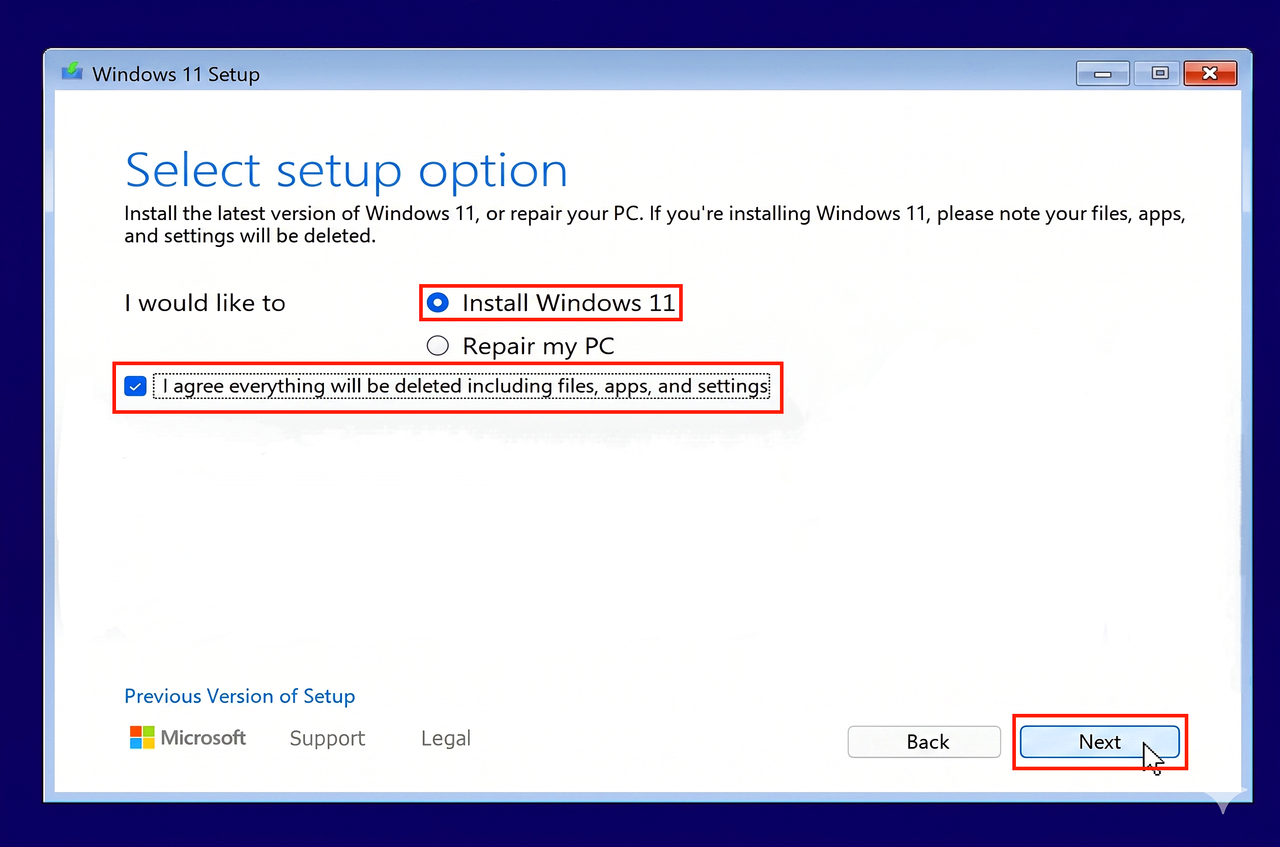
Select Setup Option
Select **"Install Windows 11"** and consent to files deletion. Click "Next".
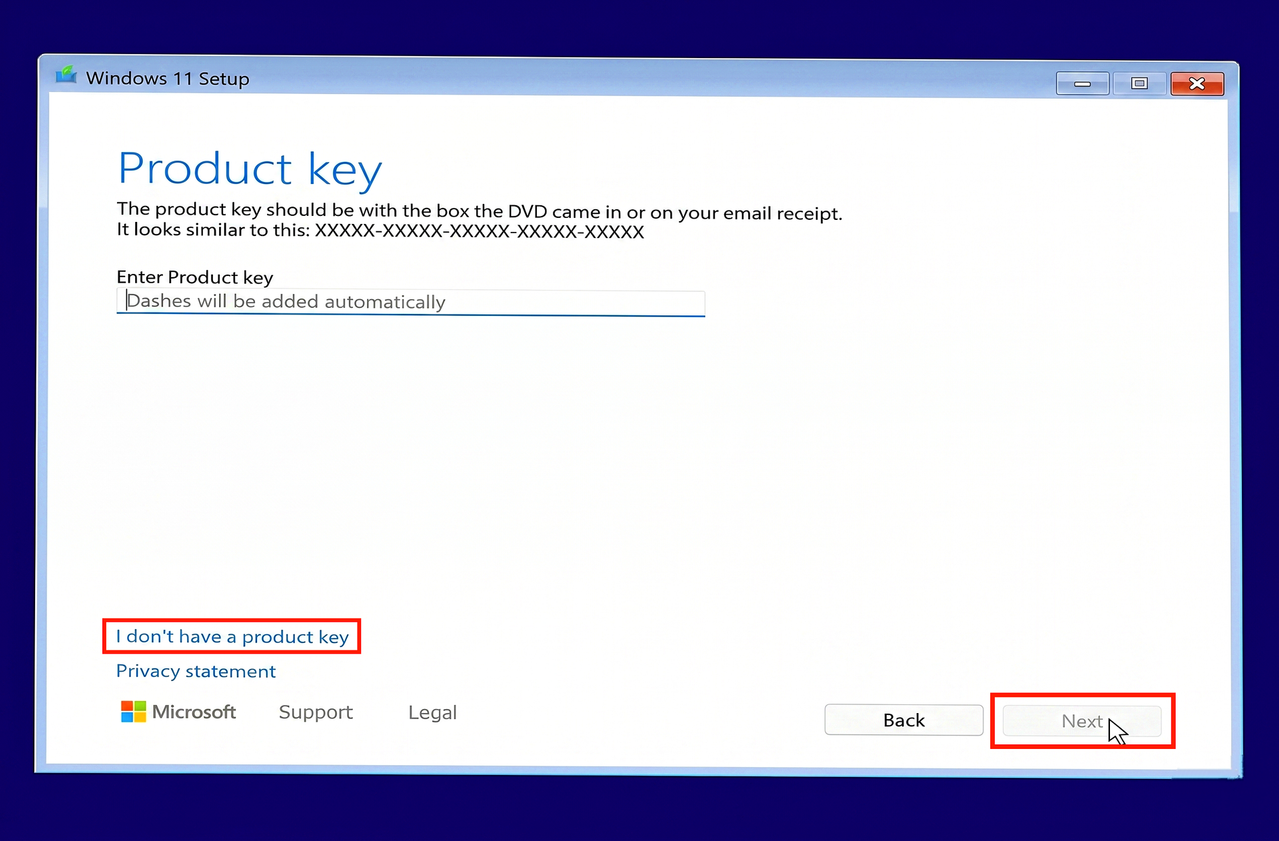
Product Key Verification
Enter key or click **"I don't have a product key"** to proceed. Click "Next".
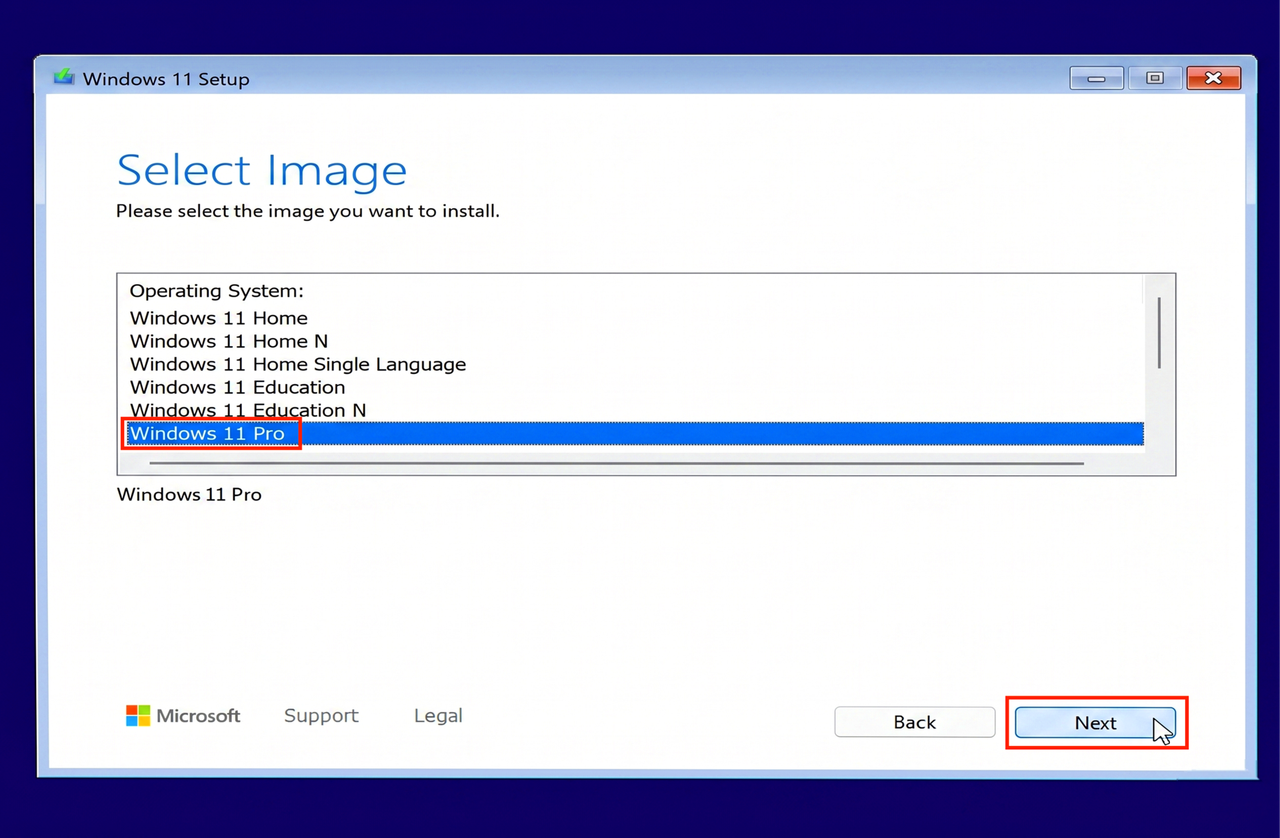
Select Windows Edition
Choose the Windows edition (e.g. **Windows 11 Pro**). Click "Next".
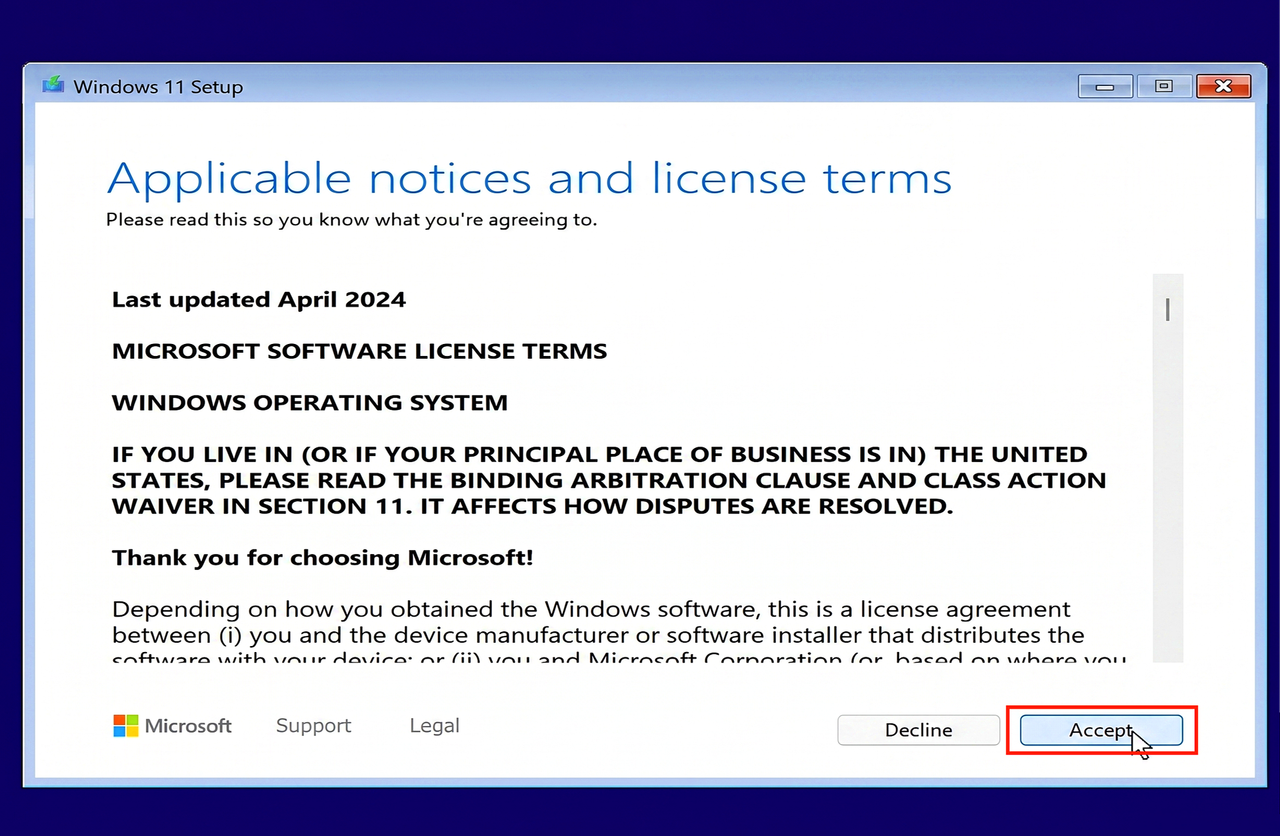
Accept License Terms
Read licensing terms and check **Accept**. Click "Next".
Format Storage & Select Partition
Set up partition drives for installation.
1. Select Primary Partition
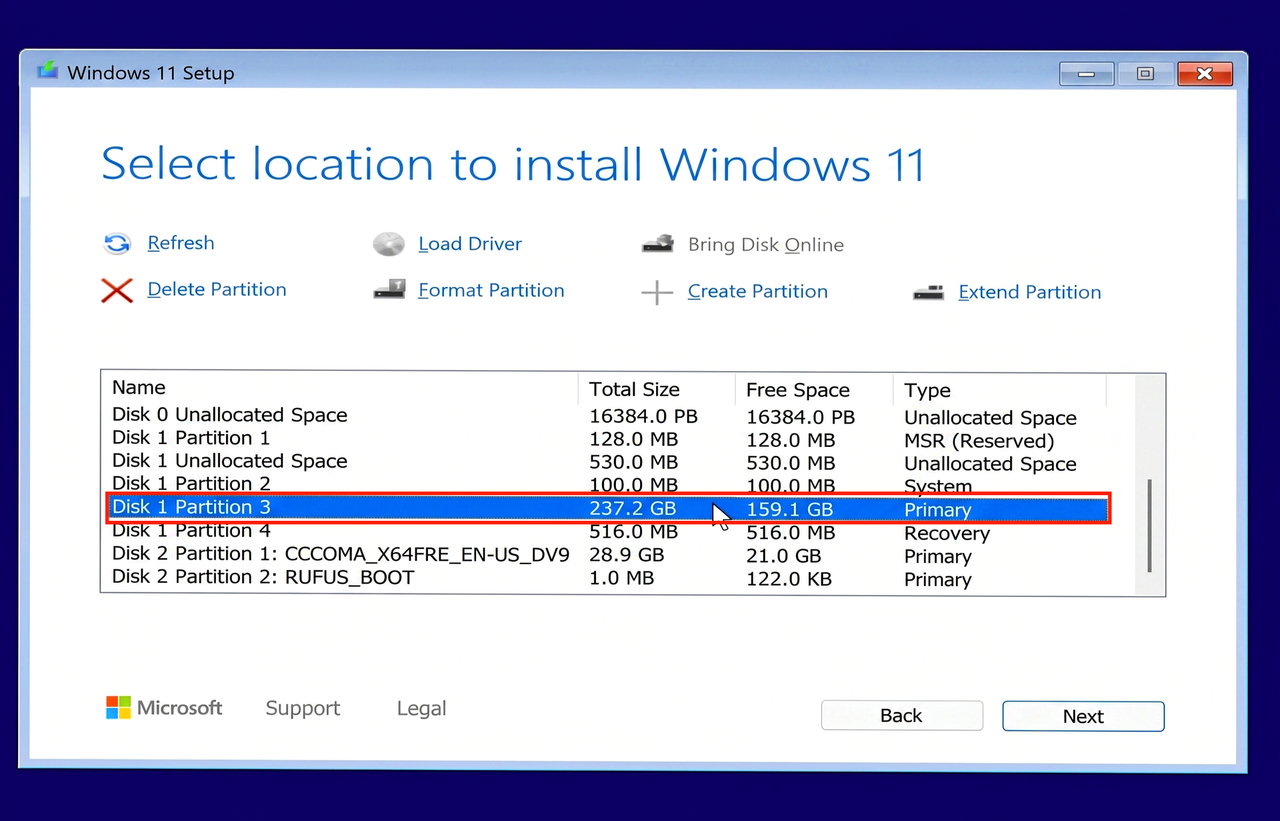
2. Format the Partition
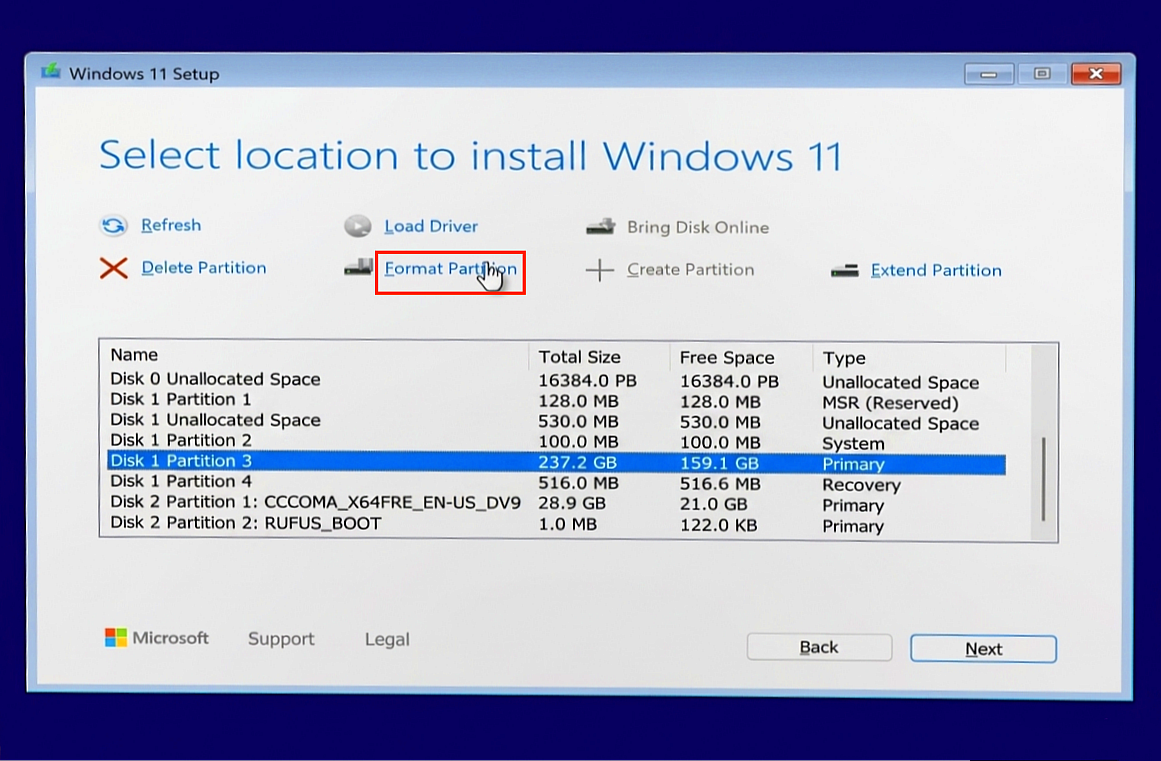
3. Select Partition Again & Continue
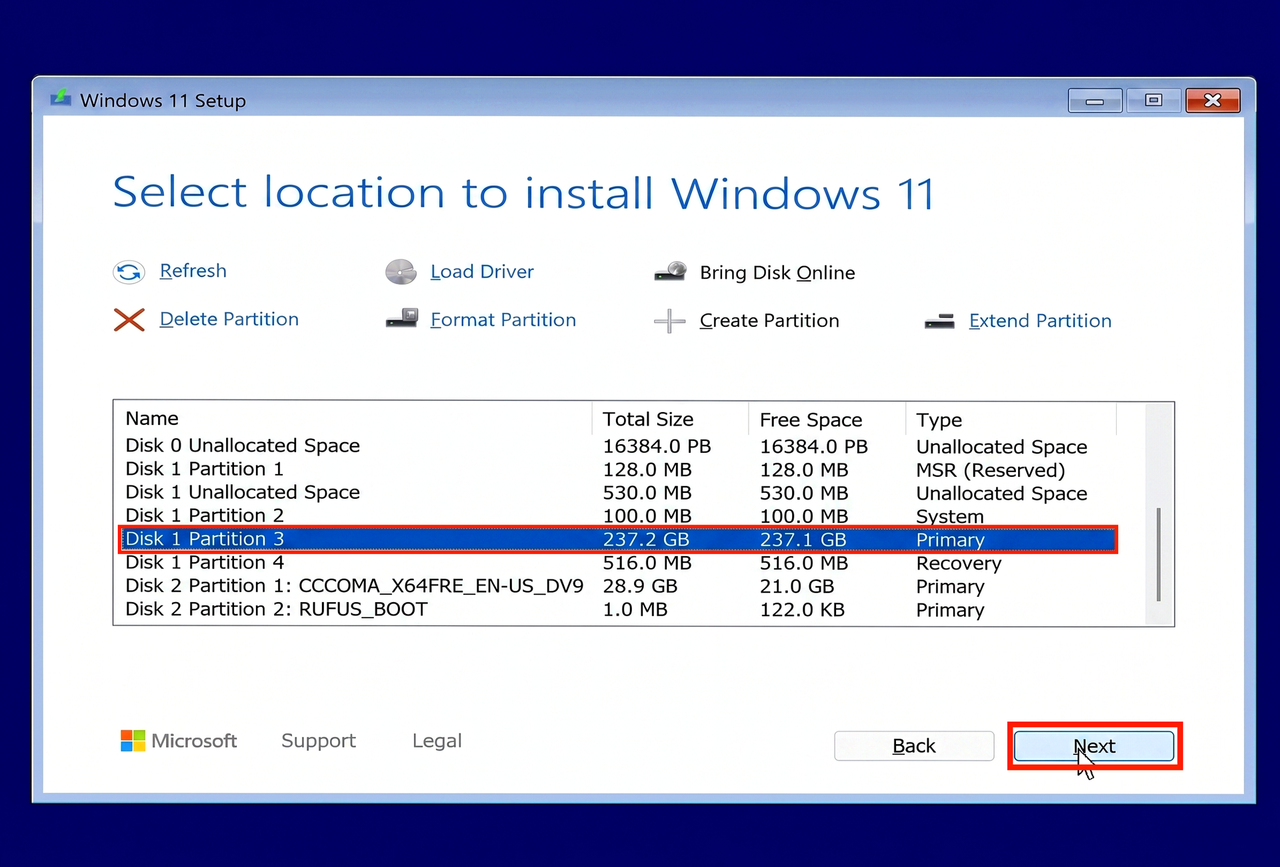
Review Installation Settings
Verify settings (Keep Nothing). Click "Install".
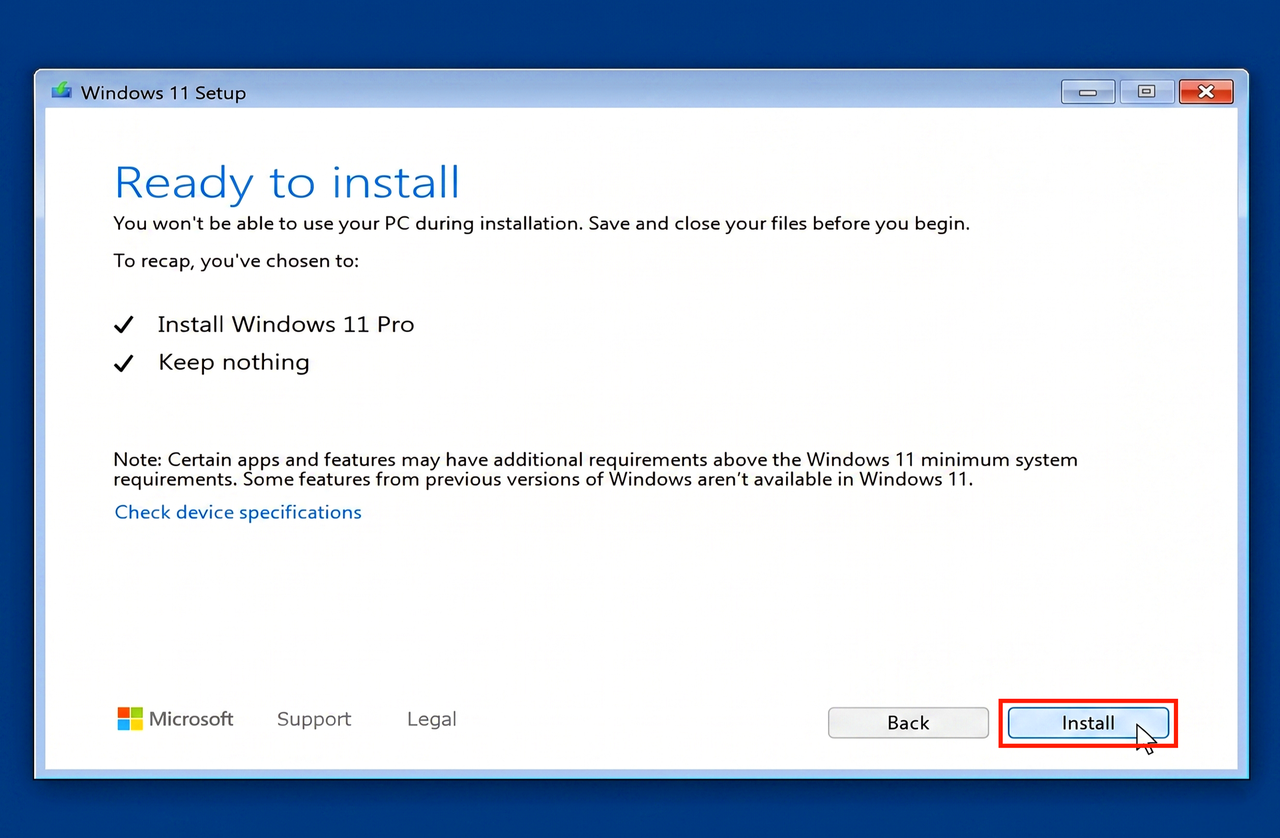
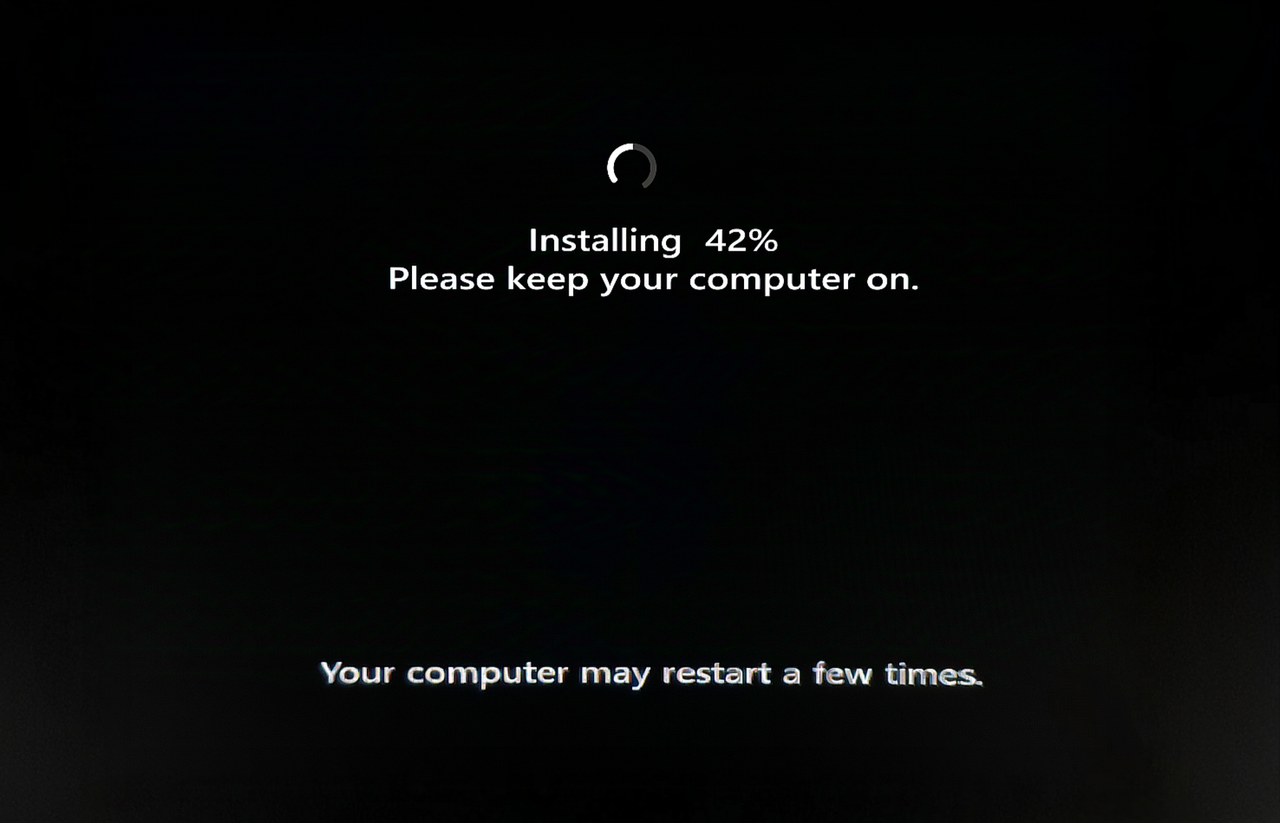
Installing Windows 11
Wait until progress reaches 100%. The computer may restart several times.
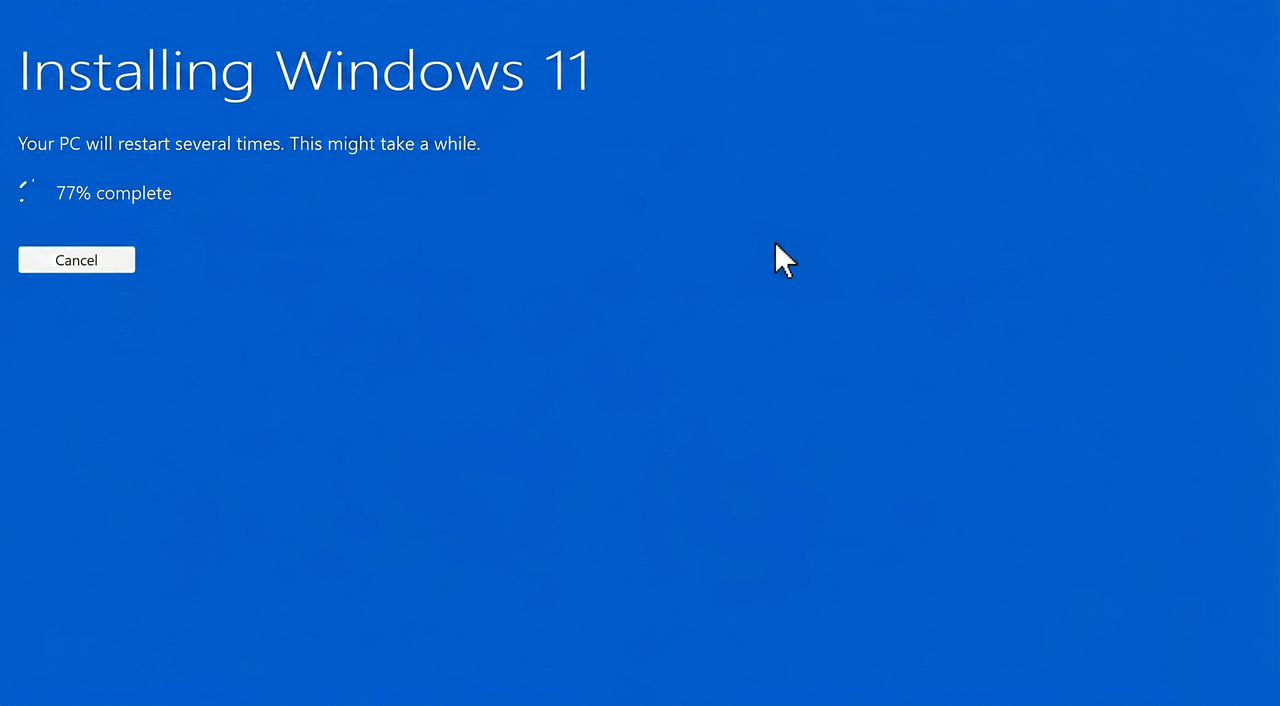
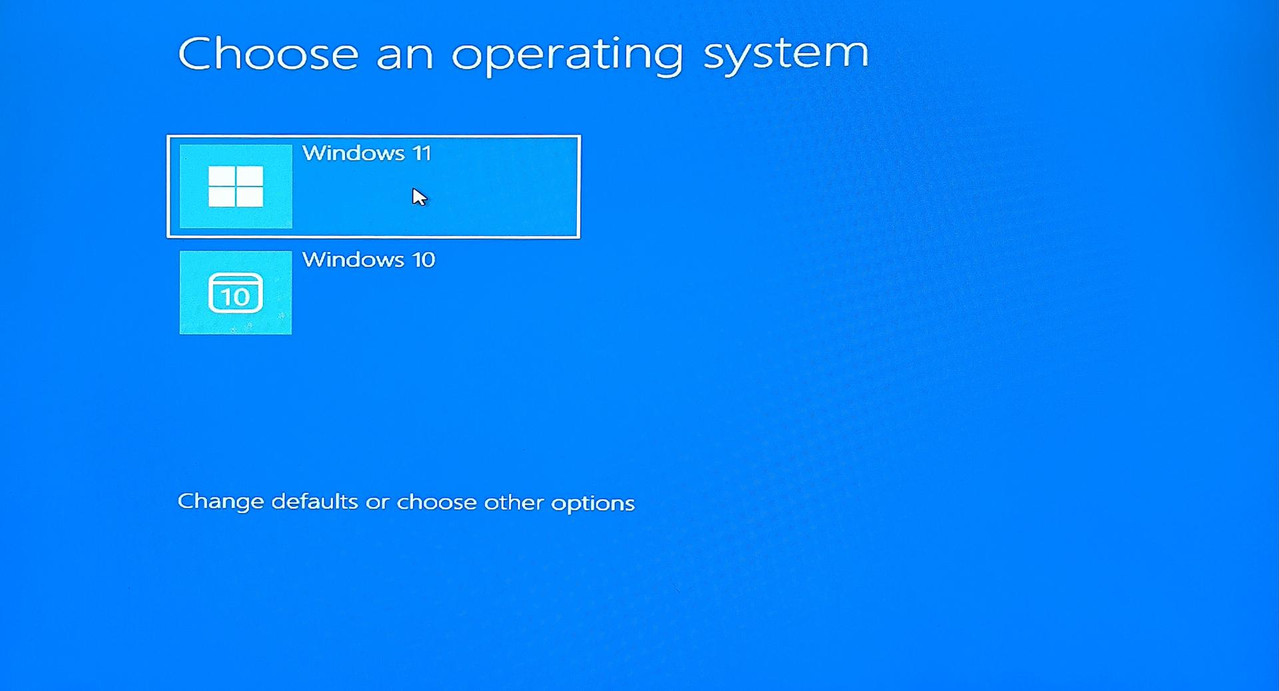
Choose Windows 11 OS
If prompted by a boot manager screen, click **"Windows 11"** to boot into the installation environment.
Windows Installation Finishing
Windows will finalize settings. Keep the device powered on.
"Just a Moment" Loader Screen
Wait while Windows prepares OOBE configurations.

Windows Logo Screen
Setup manager welcome logo loads.
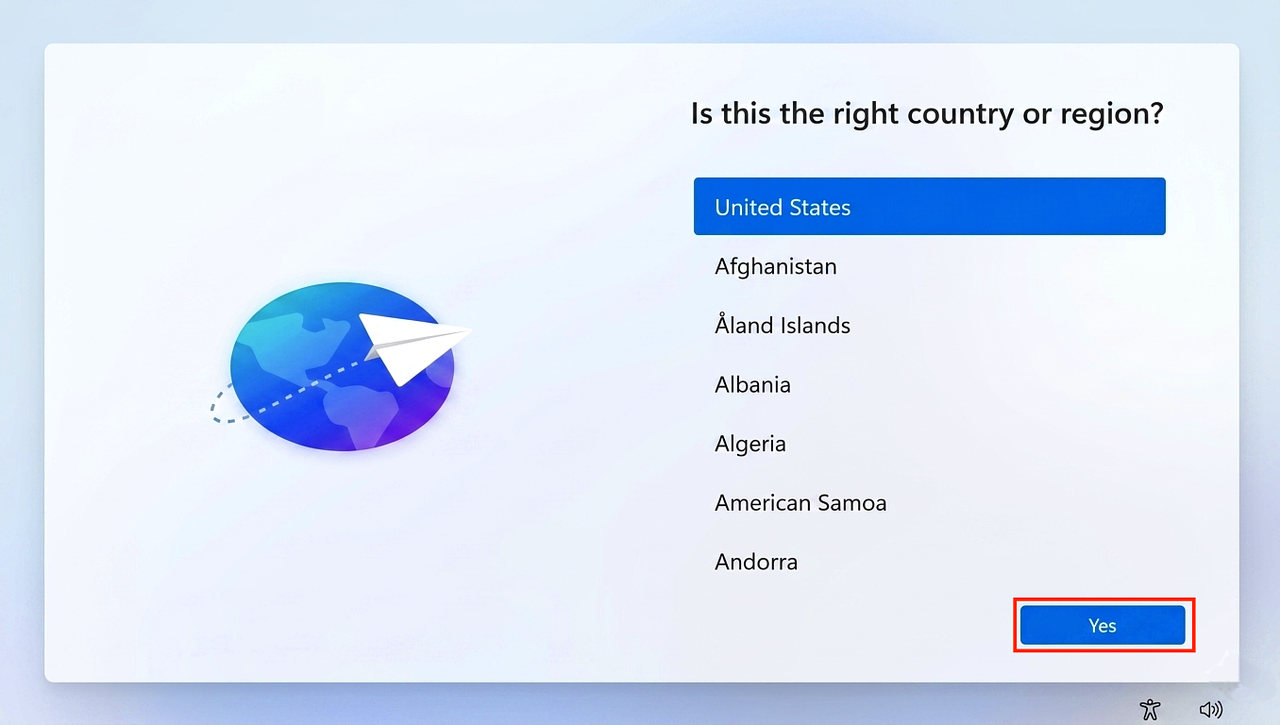
Select Region
Choose your region/country. Click "Yes".
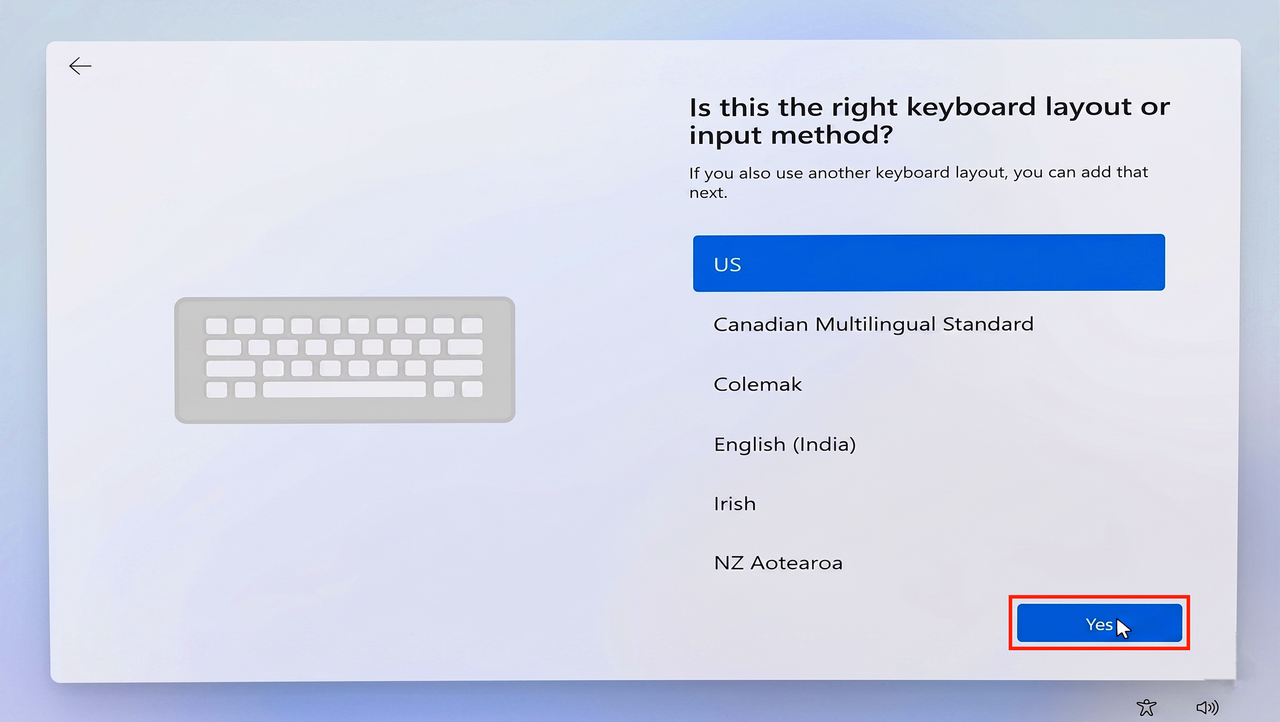
Select Keyboard Layout
Choose US Keyboard layout. Click "Yes".
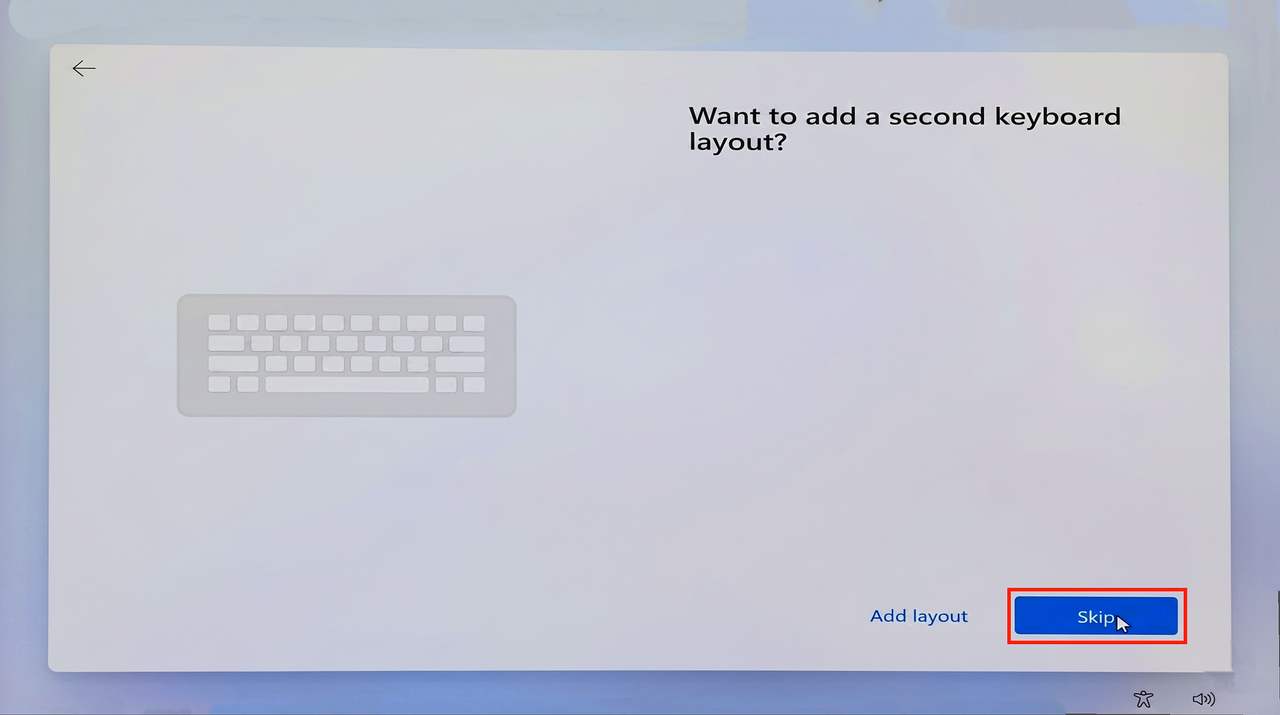
Add Second Keyboard Layout
Click "Skip".
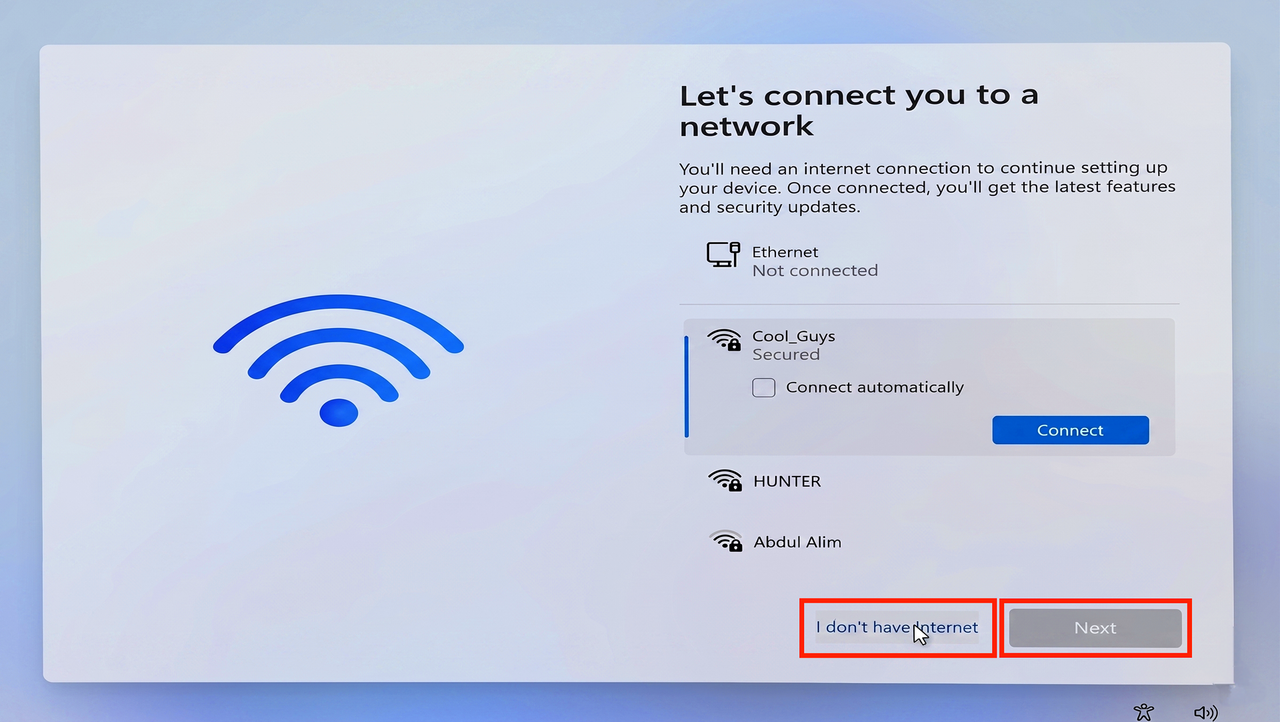
Bypass Internet Connection Requirement
Click "I don't have internet" to use local profile account setup.
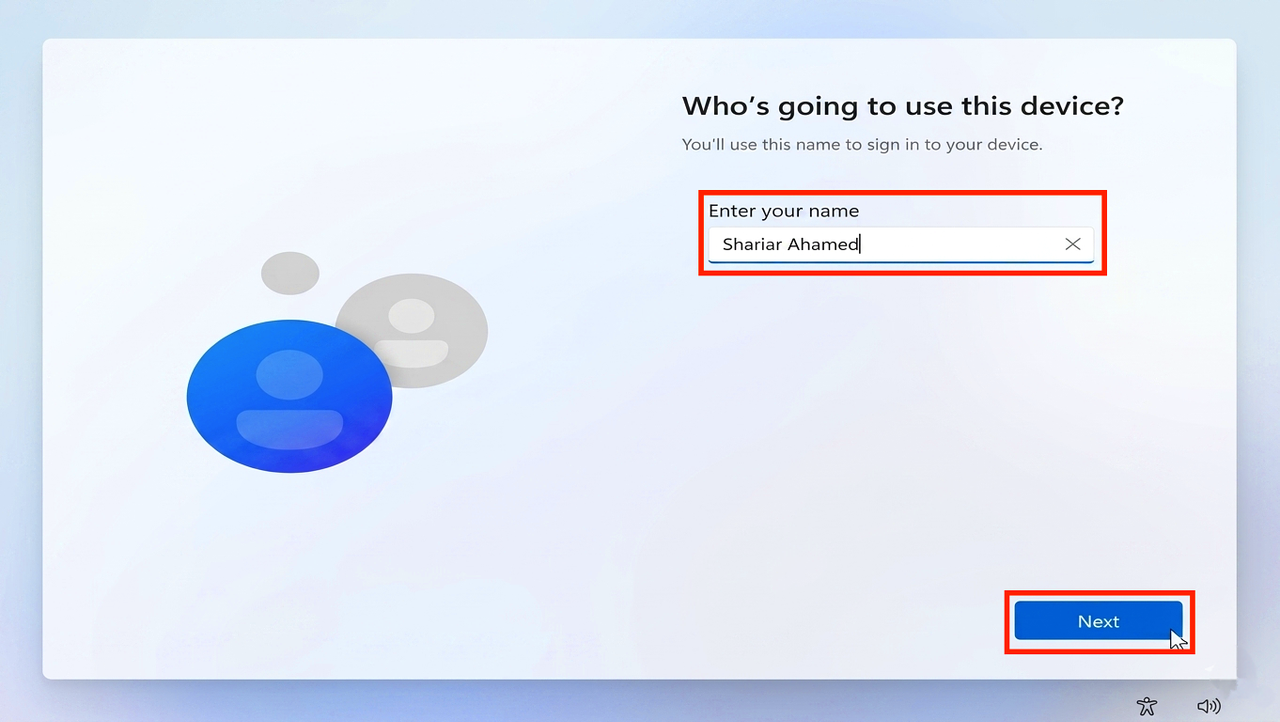
Set Account Username
Type your preferred local offline account name. Click "Next".
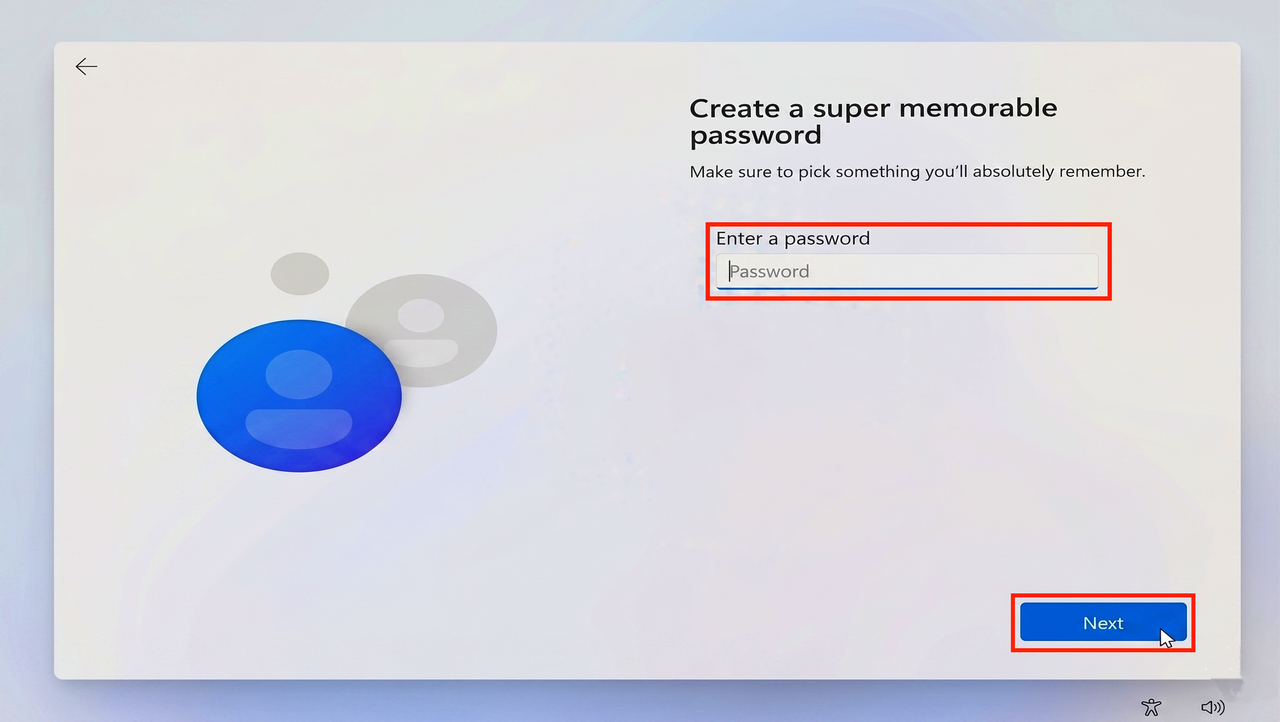
Set Account Password
Type your password. Click "Next".
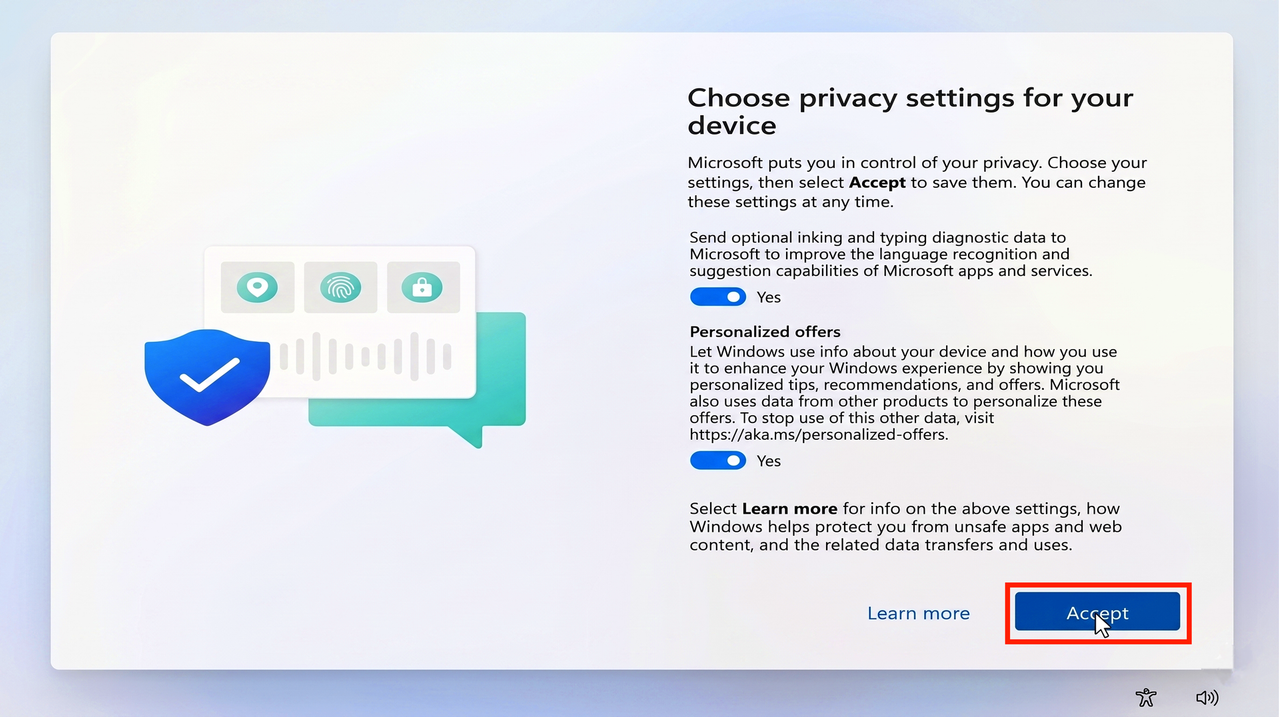
Configure Device Privacy Settings
Review and click "Accept".
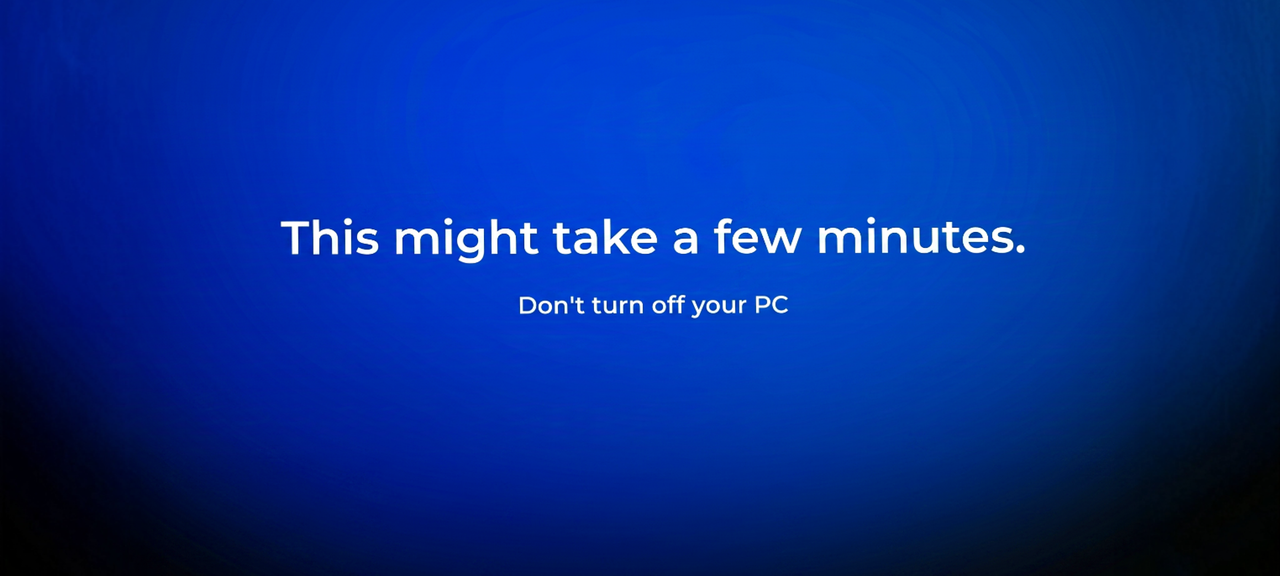
Finalizing Configuration
Wait while Windows configures the desktop.
Hi

Getting Things Ready for You

This Might Take a Few Minutes
Almost There

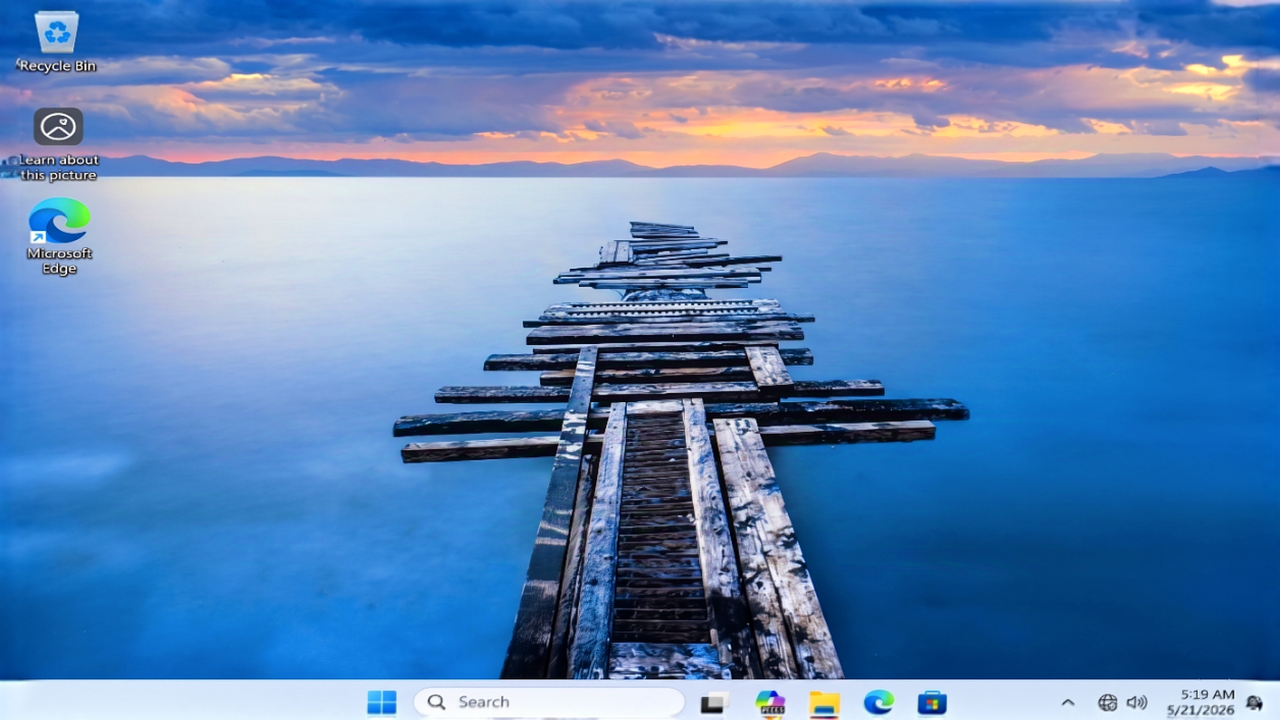
Windows Installation Completed
Congratulations! Windows 11 setup is fully complete and ready to use.
Microsoft Activation
Scripts (MAS) Guide
An open-source Windows and Office activator featuring HWID, Ohook, TSforge, and Online KMS activation methods.
PowerShell Activation Method
RECOMMENDEDOpen the Start Menu
Click on the Windows Start menu or press the Windows key on your keyboard.
Search for PowerShell
Type PowerShell in the search bar. There is no strict requirement for Administrator privileges for the recommended method, but running it as Administrator yields the best compatibility.
Execute the Command
Copy and paste the command below into the PowerShell window, and then press Enter.
This fallback command resolves DNS queries via Cloudflare over HTTPS if standard connections are restricted. Requires an updated Windows 10/11 system.
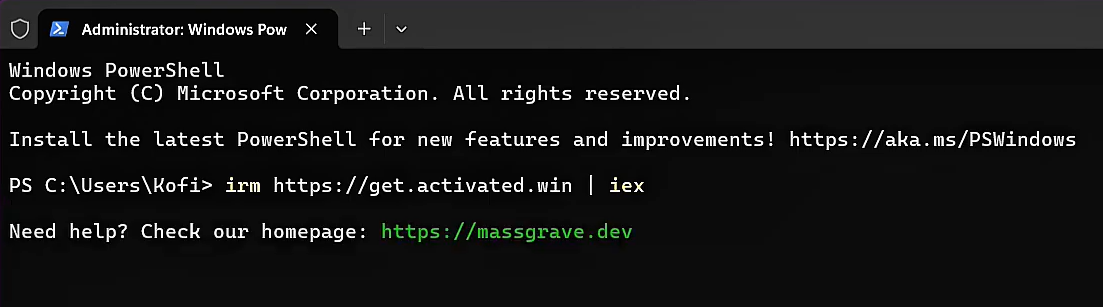
1. PowerShell Command Entry
Select Activation Option
Once the terminal menu screen displays, input the numeric key corresponding to the desired Green activation method (e.g. 1 for HWID Windows Activation, 2 for Ohook Office Activation).
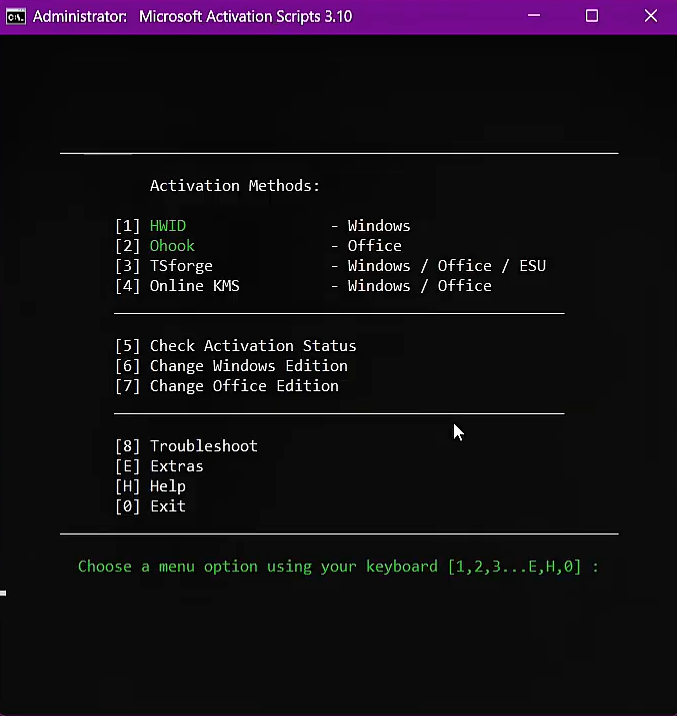
2. Menu & Method Selection
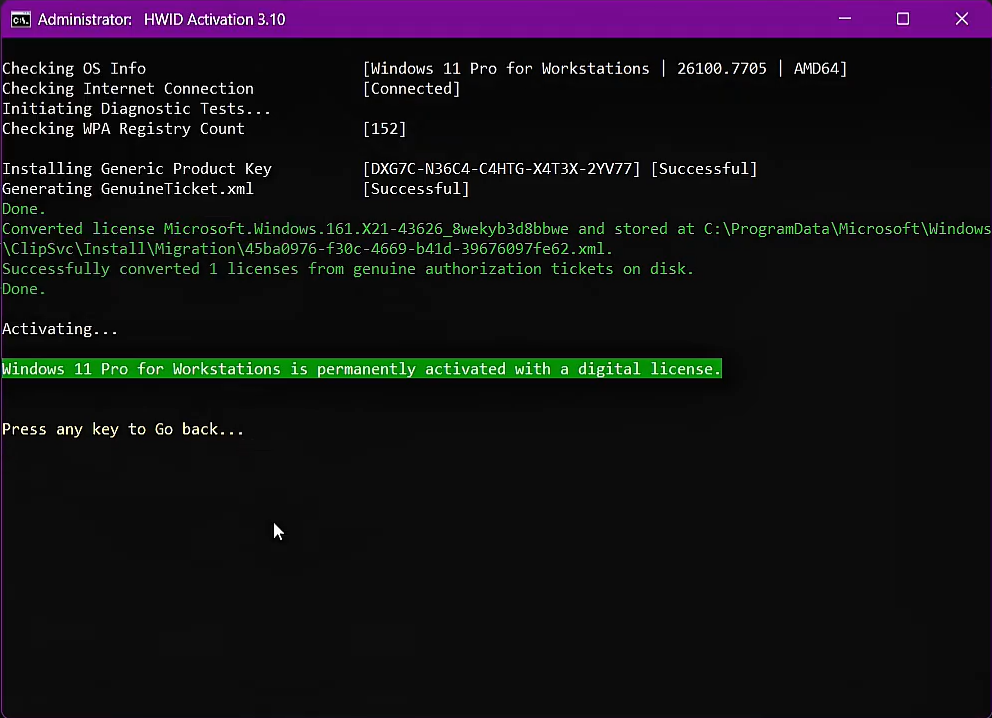
3. Activation Script Progress
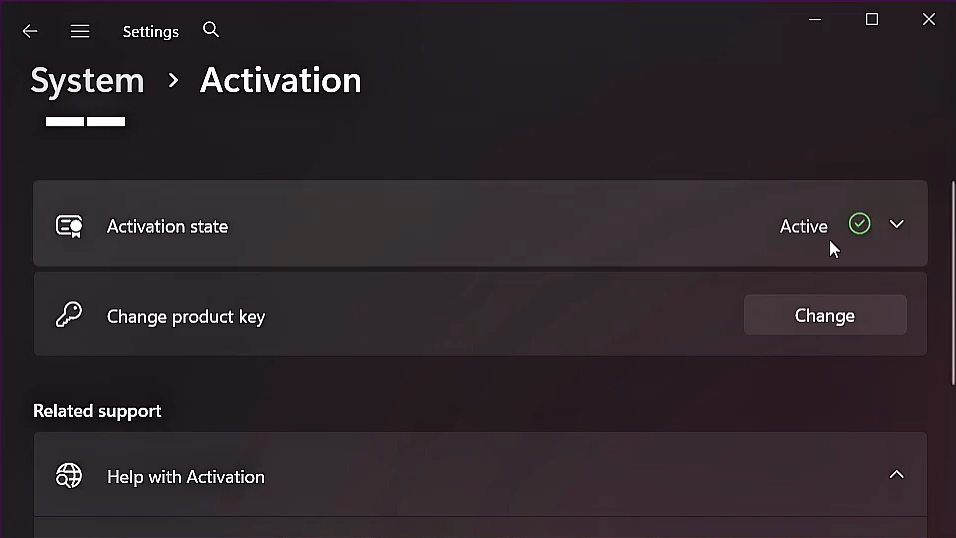
4. Successful Activation
Key Features
HWID Digital License
Permanently activate supported Windows 10/11 editions bound to your hardware.
Office Ohook
Permanently activate Microsoft Office suites locally without subscription checks.
Flexible KMS Activation
Standard 180-day activation for Windows & Office with automated renewal tasks.
Open Source & Clean
100% transparent batch script structure resulting in fewer antivirus detections.
Activations Summary
| Activation Type | Supported Products | Activation Period | Requires Internet? |
|---|---|---|---|
| HWID | Windows 10, Windows 11 | PERMANENT | Yes |
| Ohook | Microsoft Office | PERMANENT | No |
| TSforge | Windows, ESU, Office | PERMANENT | Only for StaticCID (build 26100+) |
| Online KMS | Windows, Office | 180 DAYS(Auto-renew option) | Yes |
Important Notes
- An active internet connection is mandatory to connect to the digital license validation endpoints.
- Some antivirus software might flag the script due to heuristic signatures. Temporarily disable protection if the script is blocked.
- Running PowerShell or MAS_AIO with administrator privileges resolves permissions issues.
- Ensure system versions and editions match the chosen activation algorithms (HWID, Ohook, KMS, ESU).
Pro Tips
- HWID (Hardware ID) method is recommended for permanent activation of supported Windows editions.
- Use the Ohook method specifically for stable and permanent Microsoft Office suite activations.
- Restart your machine after the activation reports success to ensure core system policies reload correctly.
- Verify your system properties in Windows Settings or Office Account settings to confirm successful status.
Official Resources